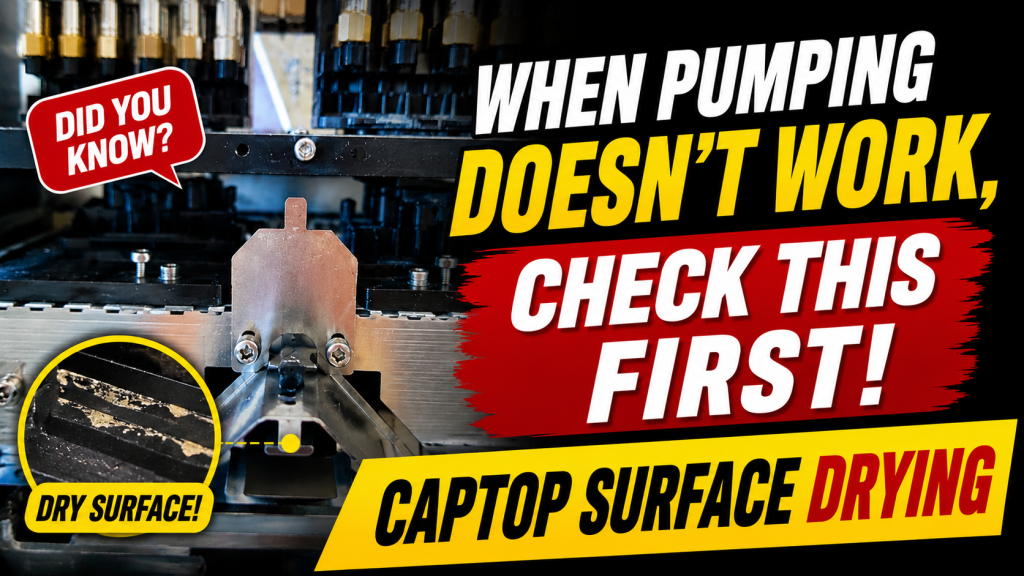
- Anyone whose pumping fails after a holiday or extended period of non-use
- Anyone whose white nozzles won’t recover despite repeated inkload and cleaning cycles
- Anyone wanting to understand how captop surface drying affects pumping
- Anyone looking to learn about head clog causes (UV reflection, white pigment settling) and prevention
- If one alcohol flush doesn’t resolve the issue, don’t give up — the entire line is filled with air and the alcohol flush must be repeated multiple times.
- Printing on tall materials increases the UV reflection angle, which can clog the entire head in an instant — place similarly tall support materials beside the print material to reduce the angle.
- Leaving the printer unused for more than a month can cause white ink to harden inside the ink tube, damper, and head nozzles — perform white cleaning, pumping, and a test print at least once every 1–2 weeks.
- When troubleshooting cleaning or pumping issues, replace both the captop and yellow tube (peristaltic pump tube) with new ones first — this speeds up diagnosis and resolution significantly.
- Pumping fails after extended non-use → check for captop surface drying first
- Fix: move head carriage left → fill white captop with alcohol → repeat inkload (pumping)
- One alcohol flush doesn’t work → entire line is air-filled / repeat the process multiple times
- Main cause of Epson head clogs → UV light reflection (heat-based clogs are an industrial head issue)
- Prevent white pigment settling → white cleaning, pumping, and test print at least once every 1–2 weeks
I. Background _ Captop Surface Drying
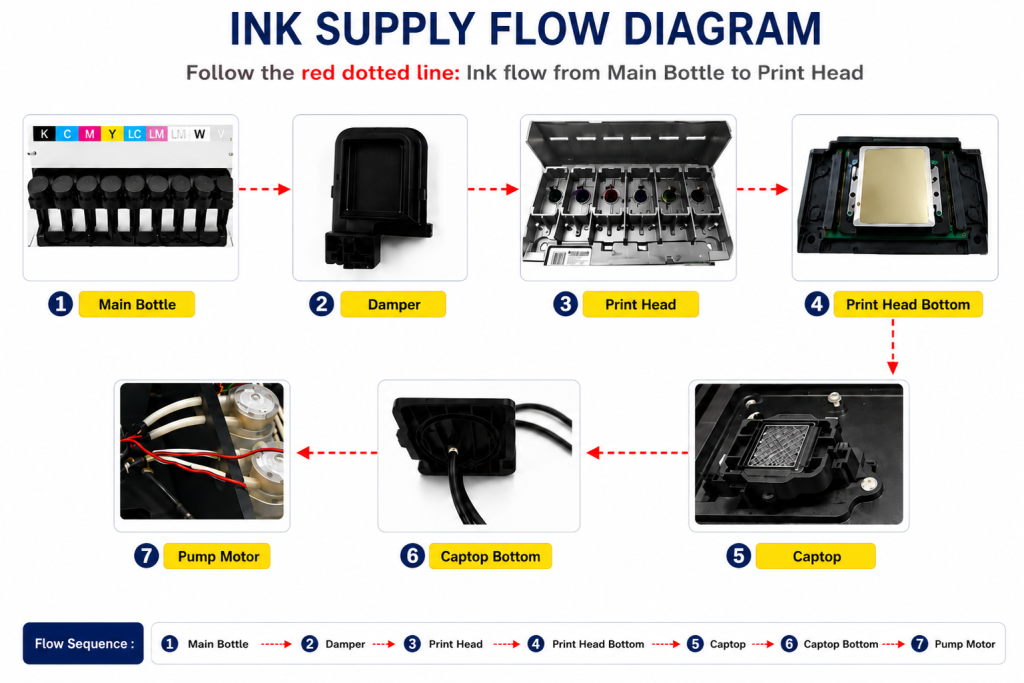
- When ink enters the Damper from the main ink bottle via the ink tube, it passes through the print head, flows to the captop, moves through the motor pump, and finally drains into the waste ink bottle.
- This article covers the Captop Surface Drying section of the full ink supply problem series.
- This follows Part 1 Captop Lower Tube, Part 2 How to Replace the Captop, Part 3 Damper, Part 4 Pump Motor and Yellow Tube, Part 5 Captop and Head Position, Part 6 Aligning the Captop and Head Position, and Part 7 When the Capping Station Level Is Not Correct.
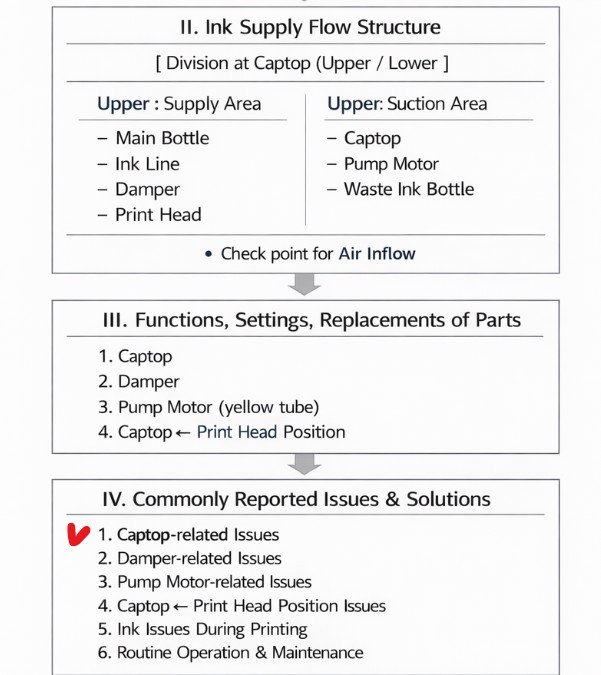
- This covers the case where pumping fails to push ink into the waste tank, even though cleaning was working fine before a holiday break.
- This is also the first thing to check whenever pumping or cleaning suddenly stops working.
II. Problem Symptoms and Resolution _ Captop Surface Drying

Everything worked fine until the Lunar New Year holiday. After the break, the printer operated normally through the morning — but the white nozzle suddenly stopped recovering in the afternoon.
First call
“When you run inkload (pumping), is the ink flowing out smoothly without air bubbles?”
Second call
“Move the head carriage to the left, pour some alcohol into the captop, then run inkload (pumping) again. If the printer hasn’t been used for a while, the white captop can dry out and ink won’t flow during pumping.”
“Press the left arrow button in the software — the head carriage will move left. Press it again when it gets to a certain point and it will stop. Where the carriage was sitting, the square with the black border is the captop. Pour enough alcohol to fill the white captop.”

Third call
“Is inkload (pumping) working now?”
“The head isn’t clogged — it’s an ink supply issue. Please repeat the same process a few more times.”
The KakaoTalk message that followed:

Why the captop surface dried out:
- While capped, the captop and head form an airtight seal — but after an extended break (the holiday), the seal gradually broke down and the captop was exposed to air
- White ink remaining on the captop surface slowly dried and hardened as it was exposed to air
- With the captop surface hardened, ink could not be drawn from the head during pumping or cleaning
Why one alcohol flush wasn’t enough:
- The first alcohol flush dissolved the dried captop surface and alcohol flowed through
- But during the previous 5 inkload and 5 cleaning cycles, all lines from the captop to the waste tank had filled with air instead of liquid
- Inkload (pumping) doesn’t work well when lines are air-filled — it relies on liquid already being present to keep liquid flowing
- → The alcohol flush must be repeated multiple times until ink finally flows through
Note — replace captop and yellow tube first
- When cleaning or pumping fails, always replace the captop and yellow tube (peristaltic pump tube) with new parts before diagnosing further
- Reducing variables speeds up both diagnosis and resolution
- Surprisingly often, replacing just these two parts resolves the cleaning and pumping issue entirely
- Watch the motor pump comparison video: before and after yellow tube replacement
III. Head Clog Causes and Precautions _ Captop Surface Drying
Industrial heads (Konica, Dimatix, Ricoh, etc.)
- Can jet ink at approximately 10 cp viscosity
- Ink viscosity is around 20 cp at room temperature, dropping to 10 cp when heated to 40–50°C by the internal heater
- Due to high viscosity, ink can sometimes harden inside the head if left unused for an extended period
Epson heads
- No internal heater — ink viscosity stays the same at room temperature and during jetting
- For reliable jetting, ink viscosity must be 7 cp or below
- The lower viscosity (thinner, more water-like) means the ink itself is less likely to clog the head compared to industrial heads
- If you look closely at the photo below, a faint nozzle pattern is visible even when full output isn’t there — this points more to an ink supply issue than an actual nozzle clog
① UV Light Reflection (key risk for Epson heads)
- Repeated UV exposure to the nozzles during printing is harmless at first, but once cumulative exposure reaches the level needed to cure ink, it can harden ink in the nozzle instantly
- Once UV ink hardens in the tiny nozzle opening, a chain reaction hardens the ink further inside the nozzle as well
- Once a nozzle is clogged by UV light, cleaning the nozzle surface alone is rarely enough to restore it
Place support materials of similar height beside the print material to reduce the reflection angle.
In May 2020, an actual incident occurred where three heads clogged while continuously printing on 70mm-tall material.
② Internal Heater Heat (industrial heads)
- If the heater continues running for an extended period without ink being jetted, residual ink at the nozzle tip hardens from the heat
- Once ink hardens inside the nozzle, inkload and cleaning cycles are rarely enough to clear the blockage
③ White Pigment Settling — Extended Non-Use
- The white main ink tank must have an agitator to keep the ink stirred
- If not stirred, white pigment sinks to the bottom and gradually hardens
- By the same principle, leaving the printer unused for about a month can cause white pigment to settle and harden inside the ink tube
- White ink can similarly harden inside the damper or head nozzles
- Even when not printing, perform white cleaning, pumping, and a test print at least once every 1–2 weeks
- No matter how busy you are, avoid leaving the equipment unused for more than a month
V. ARTJET UV Printer

핑백: Ink that has deteriorated inside the captop - Printer Cleaning Issues Part 9 ARTJET 2026
핑백: Ink tube torn - Printer Cleaning Issues Part 11 ARTJET 2026
핑백: How to Replace a Motor Pump Tube - Printer Cleaning Issues Part 12
핑백: Why it's important to replace the yellow tube and captop - Printer Cleaning Issues Part 14 ARTJET 2026
핑백: Head protection plate crumpled
핑백: Head protection plate cracked _ Printer Cleaning Issues Part 16 ARTJET 2026
핑백: When ink runs out during printing - Printer Cleaning Issues Part 17 ARTJET 2026
핑백: The color has faded - Printer Cleaning Issues Part 18 ARTJET 2026
핑백: White flies around the image - Printer Cleaning Issues Part 19 ARTJET 2026
핑백: When to replace the damper - Printer Cleaning Issues Part 20 ARTJET 2026
핑백: How to Find the Problem Color When the Color is Strange - Printer Cleaning Issues Part 21 ARTJET 2026
핑백: Printer Cleaning Problems Part 23 Table of Contents ARTJET 2026
핑백: Time for ink to fill the damper - Printer Cleaning Issues Part 10 ARTJET 2026