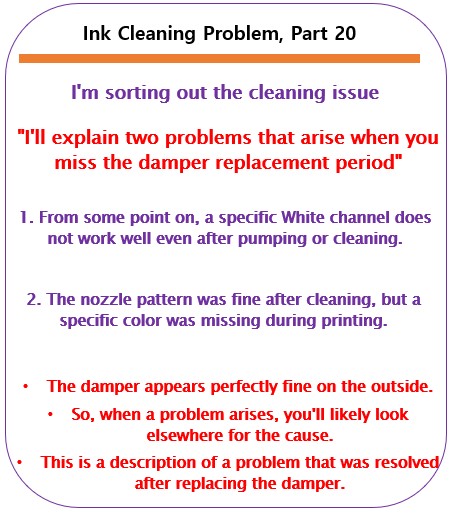
When to replace the damper – Printer Cleaning Issues Part 20
So far, I have summarized the information related to UV Printers below. If you click on the article, you will be taken to the link for related information.
- 9 articles on head basics,
- 12 articles on actual head issues and their solutions,
- 10 actual mechanical Machine Problems and Solutions.
- 12 Problems and Solutions of Electronic Boards and SW Actually Issued
- 11 Problems and Solutions: Sai Rip Installation and Basic Settings, Spot Color Creation, and More
- We’ve compiled a list of products that can be made with a UV printer.
I. Background information
We’re updating previous content.
The full text of Part 24 of the Ink Supply Issues series can be found through the link below.
24 articles on ink supply issues,

When ink flows from the main ink bottle through the ink tube to the damper, it flows through the print head to the captop, then through the motor pump to the waste ink tank.
- The first session covered the captop lower tube,
- The second session covered how to replace the captop,
- The third session covered the damper.
- In the fourth hour, the pump motor and the yellow tube.
- In the fifth hour, Captop and head position.
- In the sixth hour, how to manually align the captop and head position.
- In the seventh hour, the capping station is not level and how to level it.
- In the eighth hour, the problem of the Captop surface drying out and its solution.
- In the ninth hour, the problem and solution that occurs when deteriorated ink remains inside the Captop.
- In the tenth hour, the problems caused by too frequent pumping and cleaning.
- In the eleventh hour, the symptoms and solutions that occur when the main ink tube torn.
- In the twelfth hour, how to replace the motor pump tube.
- In the third session, why white cleaning did not work well and tips for improvement.
- In the fourteenth hour, real-life cases where white cleaning did not work well and how to resolve them.
- In the fifteenth hour, the problem and solution that could not be solved even after using all of my knowledge.
- In the sixteenth session, a pumping issue caused by a cracked head protection plate and its solution.
- In the seventeenth hour, the problem of a specific color suddenly disappearing during printing and how to resolve it.
- In the eighteenth hour, the issue of faded Color.
- In the nineteenth hour, we discussed the issue of white ink flying around the image.
You can check the details by clicking the link.
Today I’m going to talk about when to replace your dampers.
II. White, which is difficult to restore to nozzle condition _When to replace the damper
This is a 10-month-old demo unit.
- The color and varnish nozzles are almost completely cleanable without any cleaning.
- However, after about three to four months of installation, the white nozzle condition began to take time to recover.
- For the past two months, the pumping cleaning before starting the printer has been using a lot of ink and taking a considerable amount of time to maintain the white nozzle condition.
Once it started working, it was fine,,,
- The peculiar thing was that after setting the conditions once in the morning, the nozzle condition was easily restored with cleaning.
- However, the next morning, it took another long pumping and cleaning before the nozzle condition could be restored.
- Because it was a demo unit, I didn’t use it often, and each time I did, I replaced parts or addressed any suspicious issues.
- While there was some improvement after the adjustments, it wasn’t as bad as when I first installed it.
‘Why doesn’t the white nozzle condition recover with one or two cleanings like it did when I first installed it?’
III. Measures taken _When to replace the damper
1. Check the head and captop positions
Pumping and cleaning were both successful,
- but when performing a nozzle test, White channels 5 and 6 recovered immediately, while channels 1, 2, 3, and 4 took longer to recover.
- Channels 1 and 2, especially channel 1, took longer to recover.
- I improved the head and captop positioning to ensure both cleaning and pumping were successful, but cleaning the next day didn’t improve the situation.
- Since we perform numerous cleaning tests during positioning, it seems the extensive cleaning made the improvement seem more significant.
- I’m not saying that positioning the print head and captop doesn’t help with White nozzle recovery.
This is a fundamental requirement, and it wasn’t the cause of the prolonged White nozzle recovery time on our demo equipment.

If pumping still doesn’t occur after checking all the above, refer to the link below to adjust the print head and captop position.
2. Capping station Horizontal adjustment
The pumping and cleaning are working very well, but why is it so difficult to restore the nozzles in channels 1234, especially the last channel, No. 1?
- Could it be that when the captop seals to the bottom of the print head, it tilts to one side, weakening the ink suction from the last channel?
- I purchased a small level and aligned it, which significantly reduced the time it took to restore the white nozzle.
- However, it still required multiple cleanings, and it wasn’t perfect.
- See below for instructions on how to level the capping station.
- How to Level the Capping Station

Do not change the height of the White part, but adjust other areas to make it level. More important than the level is that the left and right gaps in the Capping state must be the same.
3. Other various measures
White channels 5 and 6 always worked well, but nozzles 1, 2, 3, and 4, especially 1 and 2, were particularly difficult to restore.
- “When pumping, is ink only coming out of the damper where the ink is discharged, and not from dampers 1 and 2?”
- The pump tube only hummed during the first cleaning and didn’t turn. It started turning again after the second cleaning. Initially, I simply adjusted the cleaning time.
- why white cleaning did not work well and tips for improvement
- To reduce variables, I replaced not only the pump tube but also the captop.
- After the replacement, the cleaning operation improved, which was a significant improvement.
- However, it wasn’t as good as the initial installation.
IV. Something I haven’t tried _When to replace the damper
1. Dampers that have never been replaced
Channels 5 and 6 were clean, 4 was easily restored, and 1, 2, and 3 took a bit longer.
- Even after cleaning several times and printing test images, the nozzles in channels 1, 2, and 3 remained unchanged.
- Looking at the nozzle test patterns for channels 1, 2, and 3, they felt thicker and rougher than those in channels 4, 5, and 6.
- “Perhaps the damper plays a role in ink supply, but since it’s a filter, could the mesh that traps ink residue and bubbles have reached the end of its lifespan?”
- “The pigments in varnish and color are small, so they don’t have a significant effect, but the mesh lifespan of white may be shorter due to the larger pigments.”
- There are two main white bottles. White bottle 1 supplies ink to channels 1, 2, 3, and 4, while White bottle 2 supplies ink to channels 5 and 6.
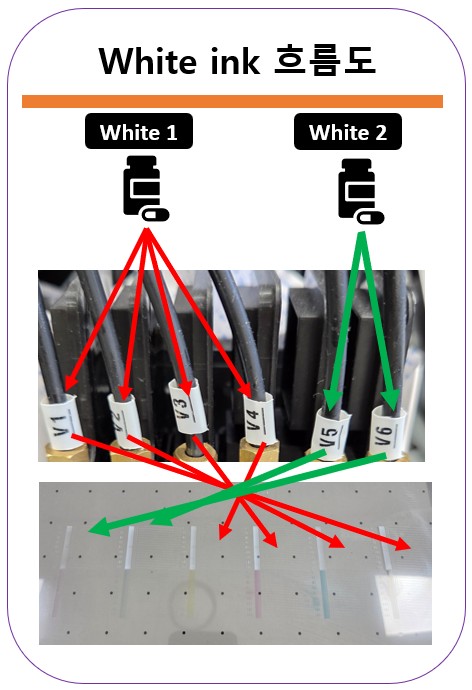
I decided to replace dampers 1, 2, 3, and 4 connected to the White 1 main bottle all at once.
- After replacing them, the nozzle condition immediately improved after one or two cleanings.
- Since the condition improved every time I took action, I thought, “Could this be a temporary issue?” and tested again the next day.
- The next day, the nozzles were all restored after one or two cleanings.
- “Still, I’ll have to wait until the weekend to know for sure.”
- A few days after the weekend, after one or two cleanings, the problematic channels 1, 2, 3, and 4, especially channel 1, quickly improved.
2. Damper function
I vaguely understand this, but a Google search revealed that the damper has two functions.
- The damper maintains the proper level when supplying ink through natural pressure, enabling the print head to jet ink.
- Secondly, it filters out ink residue or fine air bubbles.
- In other words, the reason why White 1, 2, 3, and 4 were not easily restored until now is because
- the damper’s filter function has worn out, leaving behind white ink residue, making nozzle restoration difficult.
If the pumping and cleaning are working, but the nozzle isn’t functioning smoothly and the nozzle isn’t easily restored,
- first, the captop and pump tube need to be replaced.
- If the nozzle still isn’t recoverable, it’s a good idea to replace the damper and then examine the problem.
- You can see the damper replacement video by clicking here.
V. If a specific color is missing during printing _When to replace the damper
I mentioned that the damper has two functions:
- First, it maintains the proper level of ink when supplying ink through natural pressure, enabling the print head to jet ink.
- Second, it filters out ink residue and fine air bubbles.
If the damper isn’t properly maintaining the level needed to jet ink from the head, the following symptoms may occur:
- During printing, a specific color appears fine but then suddenly disappears.
- Cleaning the printer again and checking the nozzle pattern confirms normal printing.
- When printing again, ink starts to leak again about halfway through the print, although it appears to be fine.
- Cleaning the printer again and checking the nozzle pattern confirms normal printing.
- I thought it was due to the head’s lifespan, so I replaced the head and it returned to normal operation. (This may be normal depending on the head’s condition.)
- However, over time, the color will start to leak again.
It took a considerable amount of time to identify the cause of the problem.
- While some issues can be caused by the print head, I’ll focus on ink supply here because it’s the ink supply issue.
- If a specific color is strangely missing several nozzles or is missing sporadically during printing, check as follows:
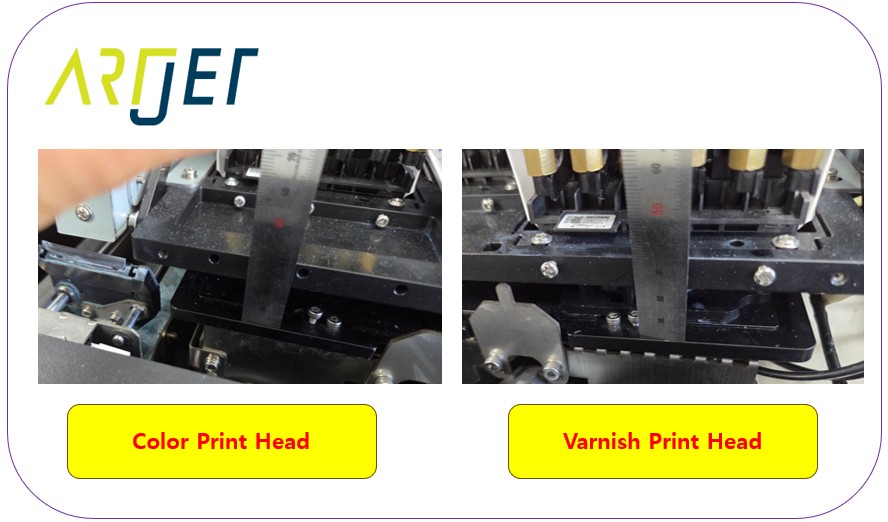
- Raise the print head to the center of the platen and visually inspect the underside of the print head.
- If ink is deposited in a specific channel on the print head surface, that channel is unable to eject ink.
- Alternatively, you can leave the print head in this position for 30 minutes and see if ink is deposited on the print head surface.
- If ink is deposited in a specific channel when you raise the print head during printing, or if ink is still deposited after 30 minutes, the damper for that channel must be replaced.
This problem occurs when the damper’s lifespan has expired, preventing it from maintaining the proper ink level during printing.
- If the nozzle pattern is fine after cleaning, but a specific color is missing during printing,
- replacing the damper is the cheapest and easiest solution, First, replace the damper.
- Then, check the problem symptoms. If that doesn’t resolve the issue,
- checking other variables one by one is the quickest solution.
VI. ARTJET UV Printer
One thing I’ve noticed after five years of sales and maintenance of ARTJET UV printers is that troubleshooting data is second only to product stability.
All products have issues, whether they’re caused by actual equipment problems or consumer error. Product stability hinges on how quickly and easily you can resolve those issues.
ARTJET compiles all troubleshooting data.
You can see the product print quality by clicking here.
Click here for ARTJET pricing and terms of sale. The exterior design has changed.

핑백: How to Find the Problem Color When the Color is Strange - Printer Cleaning Issues Part 21 ARTJET 2026
핑백: Problems that occur when ignoring the low ink alarm - Printer Cleaning Issues Part 22 ARTJET 2026
핑백: White cleaning methods that might clogged - Printer Cleaning Issues Part 23 ARTJET 2026