Time for ink to fill the damper – Printer Cleaning Issues Part 10 ARTJET 2026
So far, I have summarized the information related to UV Printers below. If you click on the article, you will be taken to the link for related information.
- 9 articles on head basics,
- 12 articles on actual head issues and their solutions,
- 10 actual mechanical Machine Problems and Solutions.
- 12 Problems and Solutions of Electronic Boards and SW Actually Issued
- 11 Problems and Solutions: Sai Rip Installation and Basic Settings, Spot Color Creation, and More
- We’ve compiled a list of products that can be made with a UV printer.
I. Background information
We’re updating previous content.
The full text of Part 24 of the Ink Supply Issues series can be found through the link below.
24 articles on ink supply issues,
This article describes real-world problems and solutions related to the Damper, highlighted in red in the full table of contents for ink supply issues.
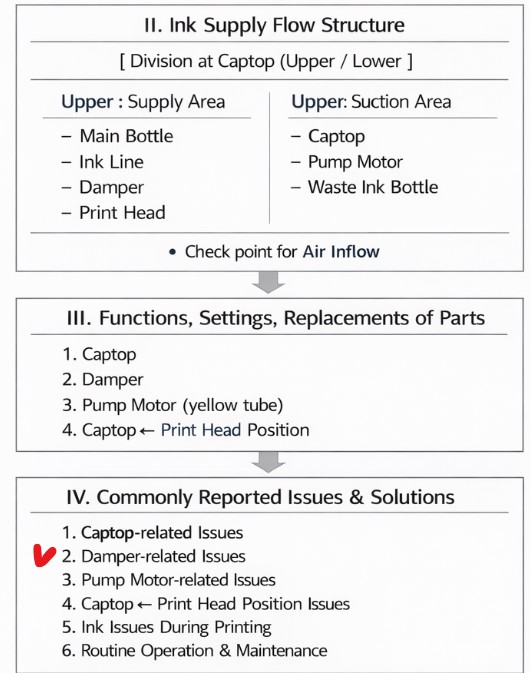

When ink flows from the main ink bottle through the ink tube to the damper, it flows through the print head to the captop, then through the motor pump to the waste ink tank.
- The first session covered the captop lower tube,
- The second session covered how to replace the captop,
- The third session covered the damper.
- In the fourth hour, the pump motor and the yellow tube.
- In the fifth hour, Captop and head position.
- In the sixth hour, how to manually align the captop and head position.
- In the seventh hour, the capping station is not level and how to level it.
- In the eighth hour, the problem of the Captop surface drying out and its solution.
- In the ninth hour, we discussed the problem and solution that occurs when deteriorated ink remains inside the Captop.
You can check the details by clicking the link.
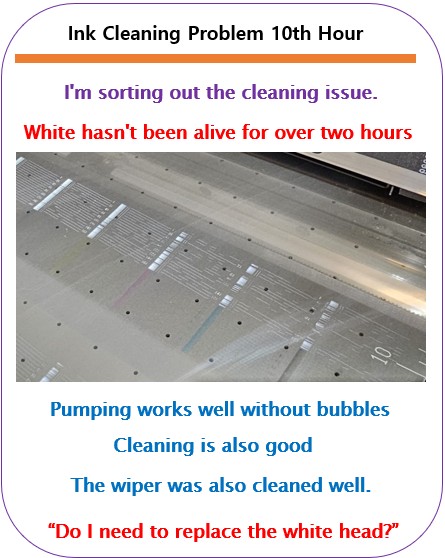
Today, I will explain why the white nozzle did not work well even after continuous cleaning and pumping, and how to solve it.
II. Problem reporting and resolution _Time for ink to fill the damper
1. Problem report
He is new to Artjet printers.
He used a UV printer from another company before, and had to return it due to equipment issues. He was very sensitive to even the smallest details.
“Do I need to replace the white head? I clean the wiper, pump, and clean it properly, but the white nozzle isn’t coming out. Is the head broken?”
“It shouldn’t break like this in such a short period of time…”
“I need to deliver prints to a customer right away, so I have one head. Should I replace it?”
“Let’s check the problem together.”
2. Problem-solving process
A. Check that the ink flows smoothly into the waste ink tank without bubbles during pumping.
- I used a video to confirm that the ink load process was successful, with white ink flowing smoothly into the waste ink tank without bubbles.
“The ink load (pumping) is working fine. Please clean it, print the nozzle pattern, and send me a photo.”
“Huh? It’s better than before.”
B. Nozzle Test after Test Print
“CEO, Even if the white is blow, just print an ARTJET test image. It’ll take about 10 minutes. When you’re done, don’t clean it. Just print the nozzle pattern and send me a photo.”
“The nozzles haven’t recovered, but they’re much cleaner.”
- I requested a test image print because the nozzles stabilize when I run a test print with the White setting at full white.
- Through test prints, some nozzles sometimes recover, and rough nozzles stabilize to some degree.
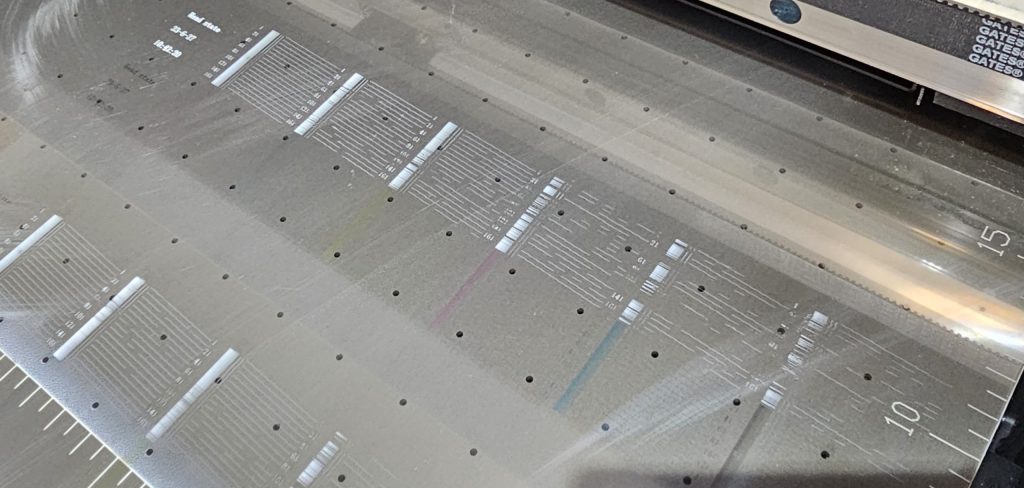
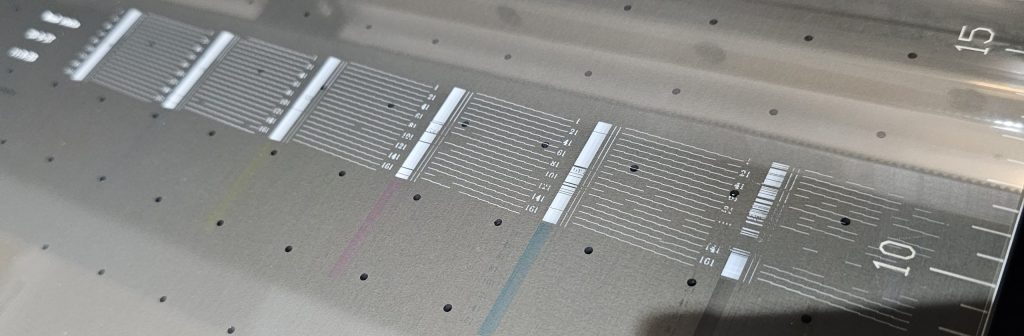
- As you can see in the photo, all six channels have normal bars, so it’s not a data-related issue. However, I needed to check whether the fixed nozzles were clogged.
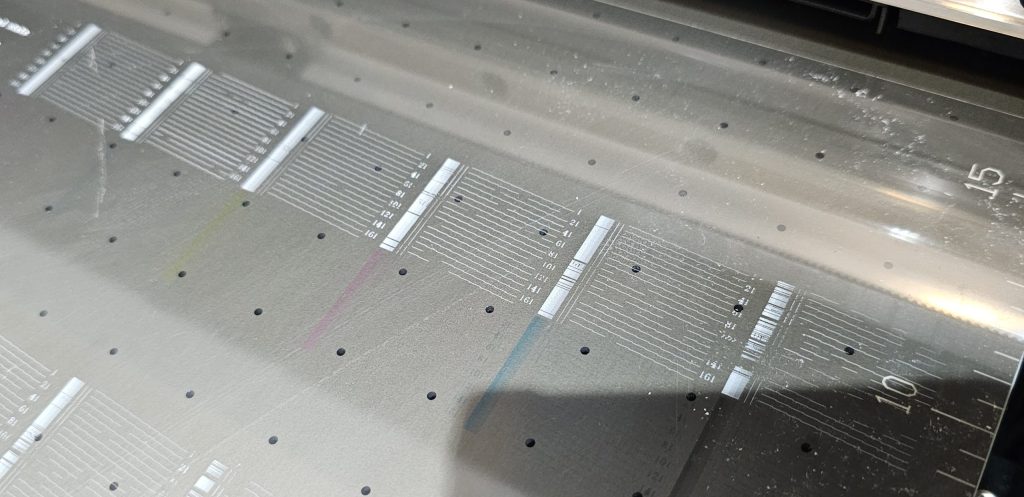
C. Nozzle Test after 1 Cleaning
“Now, after 1 cleaning, I’ll take another picture of the nozzle pattern.”
“Okay.”
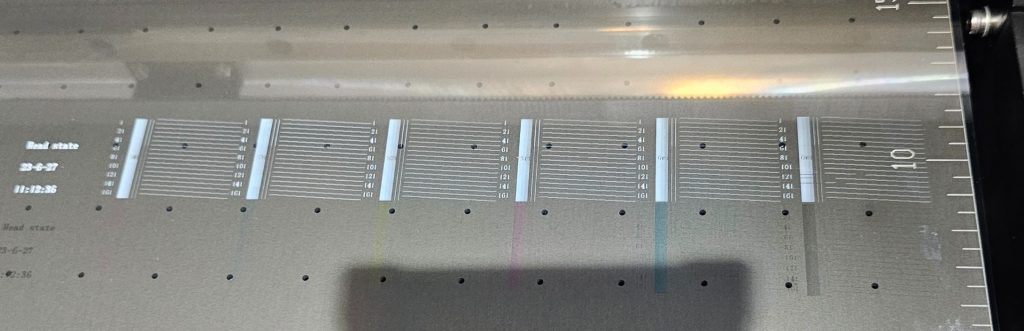
- After one cleaning, three nozzles were missed from all six channels, and all nozzles returned to normal.
- The nozzles may recover with a few more cleanings, or they may recover during printing.
- Also, among the six channels, the missing of three nozzles is not a major issue, as banding does not occur during printing. Therefore, printing at this level is not a major issue.
III. What’s the problem with his work? _Time for ink to fill the damper
1. Time for ink to fill the damper
First, let’s explain the characteristics of white ink.
- While the main white ink tank has a stirring device to ensure proper mixing,
- The ink tube connected to the damper has no stirring device and does not circulate the ink.
- White ink requires shielding, so compared to color ink, more white pigment is used. Without a stirring device, the white ink pigment settles to the bottom.
- In other words, if the UV printer is not used for 2-3 days, the heavier pigment in the white ink tube will settle, leaving only the relatively lighter white ink at the top.
- The white ink in this separated layer must be removed to achieve the proper white density during printing.
- This makes white ink more difficult to handle than color ink.
Why Nozzles Don’t Recover After Ink Loading (Pumping)
- Most compact UV printers have an ink tube approximately 2.5 meters long connected from the main ink tank to the damper.
- After 15 seconds of ink loading (pumping), the ink in the ink tube drains into the waste ink tank, and the tube fills with ink replenished from the main ink tank.
- If pumping continues for more than 10 seconds to remove the layered ink in the ink tube, the white nozzle will not recover properly even after subsequent cleaning or ink loading (pumping).
- When ink is forcibly extracted through ink loading (pumping), the damper (the intermediate storage device that holds ink to supply it to the print head) becomes slender, preventing it from being refilled with ink.
- If cleaning is performed in this state, ink will be extracted again from the damper, which is still empty.
- If the damper is not refilled with ink, a stable ink supply to the print head is not possible. If you do a nozzle test in this state, the nozzle pattern will be printed in a scattered manner.
For those unfamiliar with the equipment,
- If the nozzle condition is poor after cleaning, repeat the ink loading (pumping) and cleaning cycles quickly.
- This process doesn’t allow sufficient time for the damper to supply ink, so the nozzle pattern rarely remains intact.
- Epson heads with dampers supply ink convectively from the main bottle to the damper, so the damper slowly fills with ink.
- While ink loading (pumping) and cleaning can sometimes immediately restore the nozzle condition,
- printing a test image (about 10 minutes) to allow ink to supply to the damper will warm up the head and restore the nozzle condition.
2. Routine for restoring the White nozzle using our demo equipment
When printing heavily in white the day before, the next day’s white nozzle recovery process
- Clean 1-2 times without white ink loading (pumping). Then, perform a nozzle test in this state. If the nozzle is OK, print a test image and finish.
- If the nozzle is not in good condition, perform a 5-second ink loading and cleaning => immediately print a test image => clean 1-2 times, perform a nozzle test, and finish.
- Even during the week, if you don’t use a lot of white ink, the ink load is short because there is white separated in the damper or ink line.
- However, if you did a lot of white printing the day before, inkload (pumping) is not necessary, and the white nozzle condition can be restored by cleaning.
White nozzle recovery process on Monday after the weekend or after 2-3 days of inactivity
- The process starts with white pumping ink into the waste ink tank, then runs for 15 seconds and then stops.
- If the white nozzle pattern is satisfactory after 1-2 white cleanings, print a test image.
- After printing the test image, clean the nozzle 1-2 times and print the nozzle pattern. If satisfactory, finish.
- If the nozzle is not in good condition, repeat cleaning and nozzle pattern printing.
Test Image Printing Conditions
- If the white nozzle is not in good condition, white may fly out to the surrounding area when printing the test image.
- Since the goal is to restore the white nozzle condition, printing continues to the end even if white is blown out.
- For the test image, select Spot 1 as the [Material] option in Rip SW and configure the image so that white is printed to the full size of the image.
- For the ARTJET SW print options, set the [Double Direction] and [G_Mask_Quality] modes for faster printing.
- While printing the nozzle pattern after printing the test image may restore previously lost nozzles, the primary goal is to ensure head warm-up and stable ink supply to the damper, rather than nozzle recovery.
- After printing the test image, cleaning once or twice will significantly improve the nozzle pattern and restore it to its original state.
Varnish and color:
- Without head cleaning, nearly 90% of nozzles print cleanly.
- Only perform head cleaning when the nozzle pattern is poor.
- Even when performing head cleaning, rather than repeatedly cleaning and testing the nozzle, perform a cleaning, nozzle test, print a test image, and then perform the nozzle test without cleaning.
- This process is a faster way to restore nozzle health.
3. Summation
Epson printer heads use convection, requiring a wait for ink to be supplied to the damper.
- During ink loading (pumping), ink in the damper flows to the waste ink tank, causing the damper to contract.
- Once ink loading is complete, the contracted damper slowly fills with ink from the ink tube, restoring its original shape.
- However, if cleaning is performed before the damper fully fills, ink will be removed again before the damper is fully filled.
- If the nozzle pattern is executed in this state, ink will not be supplied stably to either the damper or the head, resulting in a poor nozzle pattern.
- From the consumer’s perspective, even after cleaning, the nozzle remains in poor condition, leading to worry and anxiety, repeating cleaning, nozzle pattern, and sometimes even pumping, endlessly.
- The nozzle will not recover, leading to concerns like, “Should I replace the whitehead?”
IV. ARTJET UV Printer
One thing I’ve noticed after five years of sales and maintenance of ARTJET UV printers is that troubleshooting data is second only to product stability.
All products have issues, whether they’re caused by actual equipment problems or consumer error. Product stability hinges on how quickly and easily you can resolve those issues.
ARTJET compiles all troubleshooting data.
You can see the product print quality by clicking here.
Click here for ARTJET pricing and terms of sale. The exterior design has changed.

핑백: How to Replace a Motor Pump Tube - Printer Cleaning Issues Part 12
핑백: Why White Cleaning Doesn't Work Well - Printer Cleaning Issues Part 13 ARTJET 2026
핑백: Head protection plate crumpled _ Printer Cleaning Issues Part 14 ARTJET 2026
핑백: When ink runs out during printing - Printer Cleaning Issues Part 17 ARTJET 2026
핑백: The color has faded - Printer Cleaning Issues Part 18 ARTJET 2026
핑백: White flies around the image - Printer Cleaning Issues Part 19 ARTJET 2026
핑백: When to replace the damper - Printer Cleaning Issues Part 20 ARTJET 2026
핑백: How to Find the Problem Color When the Color is Strange - Printer Cleaning Issues Part 21 ARTJET 2026
핑백: White cleaning methods that might clogged - Printer Cleaning Issues Part 23 ARTJET 2026
핑백: Printer Cleaning Problems Part 23 Table of Contents ARTJET 2026