Head protection plate cracked – Printer Cleaning Issues Part 16
So far, I have summarized the information related to UV Printers below. If you click on the article, you will be taken to the link for related information.
- 9 articles on head basics,
- 12 articles on actual head issues and their solutions,
- 10 actual mechanical Machine Problems and Solutions.
- 12 Problems and Solutions of Electronic Boards and SW Actually Issued
- 11 Problems and Solutions: Sai Rip Installation and Basic Settings, Spot Color Creation, and More
- We’ve compiled a list of products that can be made with a UV printer.
I. Background information
We’re updating previous content.
The full text of Part 24 of the Ink Supply Issues series can be found through the link below.
24 articles on ink supply issues,
This article describes problems and solutions that can occur when the captop and head positions are not aligned, as shown in red in the full table of contents for ink supply problems.
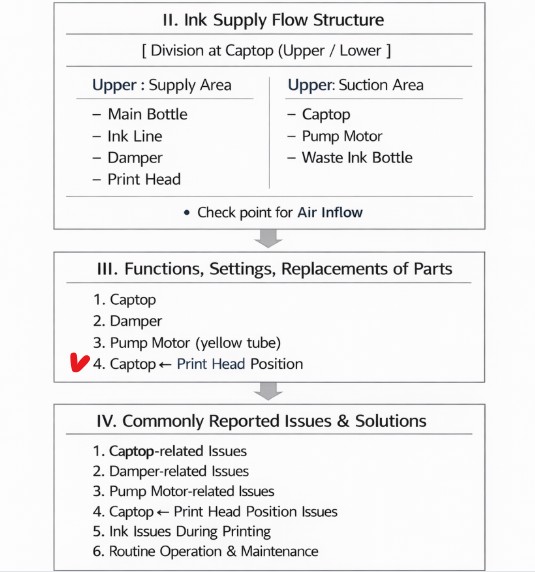

When ink flows from the main ink bottle through the ink tube to the damper, it flows through the print head to the captop, then through the motor pump to the waste ink tank.
- The first session covered the captop lower tube,
- The second session covered how to replace the captop,
- The third session covered the damper.
- In the fourth hour, the pump motor and the yellow tube.
- In the fifth hour, Captop and head position.
- In the sixth hour, how to manually align the captop and head position.
- In the seventh hour, the capping station is not level and how to level it.
- In the eighth hour, the problem of the Captop surface drying out and its solution.
- In the ninth hour, the problem and solution that occurs when deteriorated ink remains inside the Captop.
- In the tenth hour, the problems caused by too frequent pumping and cleaning.
- In the eleventh hour, the symptoms and solutions that occur when the main ink tube torn.
- In the twelfth hour, how to replace the motor pump tube.
- In the third session, why white cleaning did not work well and tips for improvement.
- In the fourteenth hour, real-life cases where white cleaning did not work well and how to resolve them.
- In the fifteenth hour, I explained the problem and solution that could not be solved even after using all of my knowledge.
You can check the details by clicking the link.
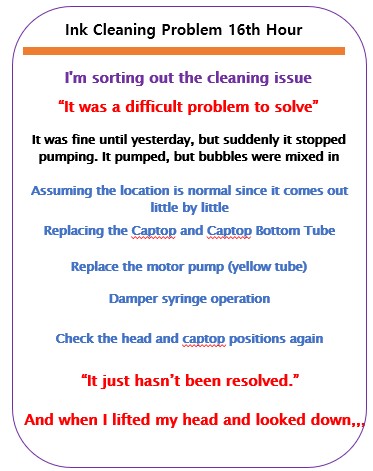
Today, I will explain the problem of the head protection plate being cracked and preventing pumping.
II. Problem symptoms _Head protection plate cracked
This is a problem that has occurred twice in five years of printer maintenance.
When a problem occurs, the symptoms can vary.
- Until yesterday, it was working fine, but today, suddenly, ink doesn’t flow into the waste ink tank even when pumping or cleaning.
- When pumping, ink does flow into the waste ink tank, but bubbles come out.
III. Problem-solving process _Head protection plate cracked
1. Basic assumptions
The head and captop positions are fine.
- Until yesterday, there were no ink loading (pumping) issues. While some ink bubbles were present, the ink was still flowing into the waste ink tank.
- I assumed the mechanical changes, such as the print head and captop positions, were the same.
Then, I started checking other issues.
2. Bottom inspection based on Captop
Based on the captop, the bottom is:
- 1. Captop itself
- 2. Ink tube connected to the bottom of the captop
- 3. Motor pump tube (yellow tube) connected to the ink tube
- 4. Motor pump inside the cap, whether it’s working
While replacing 1. Captop, I also replaced 2. the ink tube connected to the bottom of Captop with a new one, but it still didn’t pump.
After replacing 3. the yellow tube, 4. the motor pump inside the cap worked fine, but it didn’t pump properly.
3. Top inspection based on Captop
Based on the captop, the top is:
- 1. Ink tube and damper connection
- 2. Damper and head connection
We started with the assumption that the captop and head positions remained unchanged. Since we confirmed there were no issues with the bottom of the captop, we began inspecting the top of the captop.
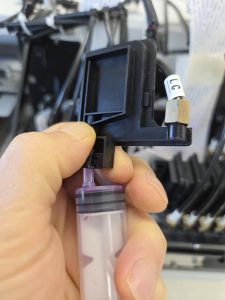
After removing the damper for each color channel from the print head and drawing ink with a syringe, no air bubbles were detected. Therefore, 1. the ink tube and damper connection is normal.
The damper was also pressed tightly when inserted into the head, so 2. the connection between the 2 dampers and the head is also normal.
The method for checking air bubbles using a syringe differs between the Color head and the White/Varnish head.
- See below for details.
- When working with White, Varnish syringes, click here to see a video.
4. Doubts about basic assumptions
As shown below, the head and captop positions were fine.
- Until yesterday, there were no ink loading (pumping) issues. While ink was coming out as bubbles, it was still flowing into the waste ink tank.
- I assumed the mechanical changes were due to the print head and captop positions being the same.
However, since both the top and bottom of the captop were normal, I began to re-examine the head and captop positions.
This explains how to identify head and captop position issues.

- Varnish is pumping normally, but Color isn’t.
- Connect the Color captop’s lower tube to the Varnish’s yellow tube, and the Varnish captop’s lower tube to the Color.
- If only Varnish is still coming out, but no color, when pumping both Color and Varnish,
- I conclude that the Color head and Captop are not positioned correctly, or that the ink isn’t sealed for some reason.
Until yesterday, the printer was pumping, and bubbles were still coming out, but ink was still coming out little by little.
- Rather than a head or Captop position issue,
- I suspect the head and Captop aren’t sealing properly for some reason.
5. Captop and head seal
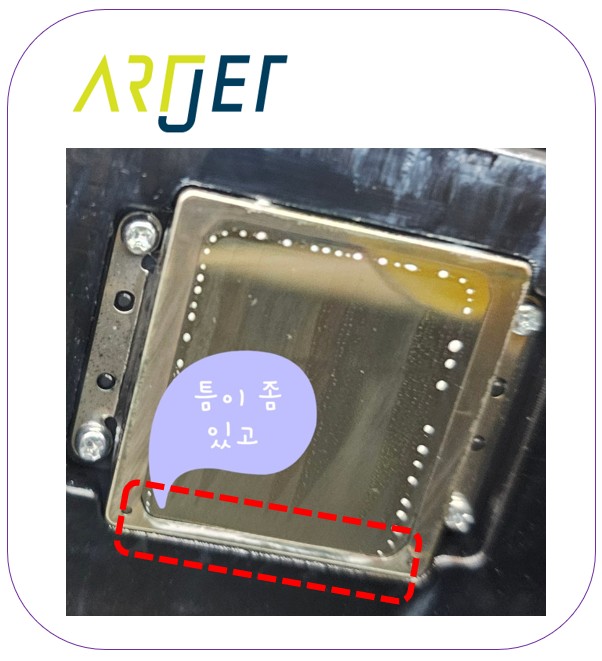
While pumping, I noticed a lot of bubbles forming behind the captop. I raised the head and inspected the condition of the protective plate.
As shown below, the protective plate on the back was slightly displaced.
There are two solutions.
The first solution is:
- The captop edge is not centered in the head.
- Slightly adjust the lower part or the entire captop to center it.
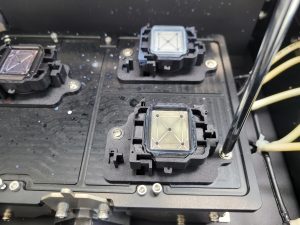
The second solution:
- Removing the head protection plate.
- I checked with the CEO, and it appears there was a previous head collision, causing the protection plate to slightly open.
- Adjusting the captop position is more difficult than you might think, and even a slight misalignment can cause pumping failure.
- For this reason, the area I worked on today had the head protection plate removed.
- Please refer to the instructions below for how to remove the head protection plate.
- Even with all my knowledge, I was able to resolve the issue of pumping failure.
IV. Summation _ Head protection plate cracked
If the ink pumping suddenly stops, it’s best to check the easiest parts one by one.
- The easiest is to firmly press the damper to ensure it’s firmly connected to the head.
- Check if the lower tube of the captop is loose. Remove the captop and pull out the ink tube by hand. If it comes out easily, there’s a problem. If it doesn’t come out firmly, it’s fine.
- If this doesn’t work, replace the captop.
- If replacing the captop doesn’t work, replace the motor pump tube (yellow tube).
- Check the connection between the damper and the ink tube. Pull the ink tube out of the damper by hand. Check for tightness. When drawing ink with a syringe, no bubbles should come out.
- Check the correct position of the print head and captop.
- Check if the print head protective plate is not dented.
- Check if the print head protective plate is not split in any specific area.
The cause of the problem described today was a gap in the print head protection plate, allowing air to flow through the gap, preventing ink from being sucked up during ink loading (pumping).
The solution was to:
- During capping, position the cap top so that the rubber cap top is free of the gap.
- Or, remove the head protection plate.
V. ARTJET UV Printer
One thing I’ve noticed after five years of sales and maintenance of ARTJET UV printers is that troubleshooting data is second only to product stability.
All products have issues, whether they’re caused by actual equipment problems or consumer error. Product stability hinges on how quickly and easily you can resolve those issues.
ARTJET compiles all troubleshooting data.
You can see the product print quality by clicking here.
Click here for ARTJET pricing and terms of sale. The exterior design has changed.

핑백: When to replace the damper - Printer Cleaning Issues Part 20 ARTJET 2026
핑백: How to Find the Problem Color When the Color is Strange - Printer Cleaning Issues Part 21 ARTJET 2026
핑백: Problems that occur when ignoring the low ink alarm - Printer Cleaning Issues Part 22 ARTJET 2026