
- Anyone whose cleaning and pumping performance has noticeably dropped over time
- Anyone whose rollers inside the motor pump cap won’t spin properly, leading to thoughts of replacing the pump motor
- Anyone looking for the replacement cycle and method for the yellow tube (peristaltic pump tube)
- Anyone who increased the pump motor speed but still sees no improvement
- If the rollers won’t spin, check the yellow tube (peristaltic pump tube) first — not the pump motor itself — increasing pump speed won’t help if the tube has shrunk
- Just because the tube looks fine from the outside doesn’t mean the tube inside the cap is okay — the tube inside is constantly compressed by the rollers and shrinks more severely
- If cleaning or pumping isn’t working properly, try replacing the yellow tube first — it saves significant cost and time compared to replacing the pump motor
- Cleaning/pumping performance drops + rollers won’t spin → not a pump motor issue — yellow tube shrinkage is the cause
- Rollers only spin in place; they need contact with the yellow tube to rotate clockwise → tube shrinkage = lost contact surface
- Replacing the yellow tube alone restores normal roller rotation → cleaning and pumping return to normal
- Symptoms appeared after ~18 months on our demo unit — replacement cycle varies by usage volume
I. Background _ How to Replace a Motor Pump Tube
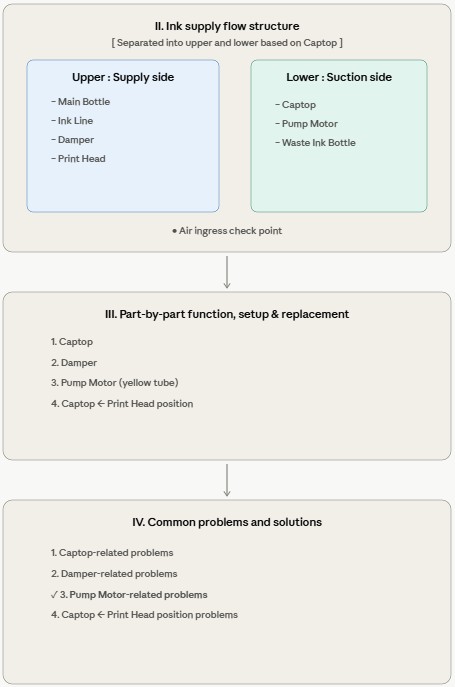
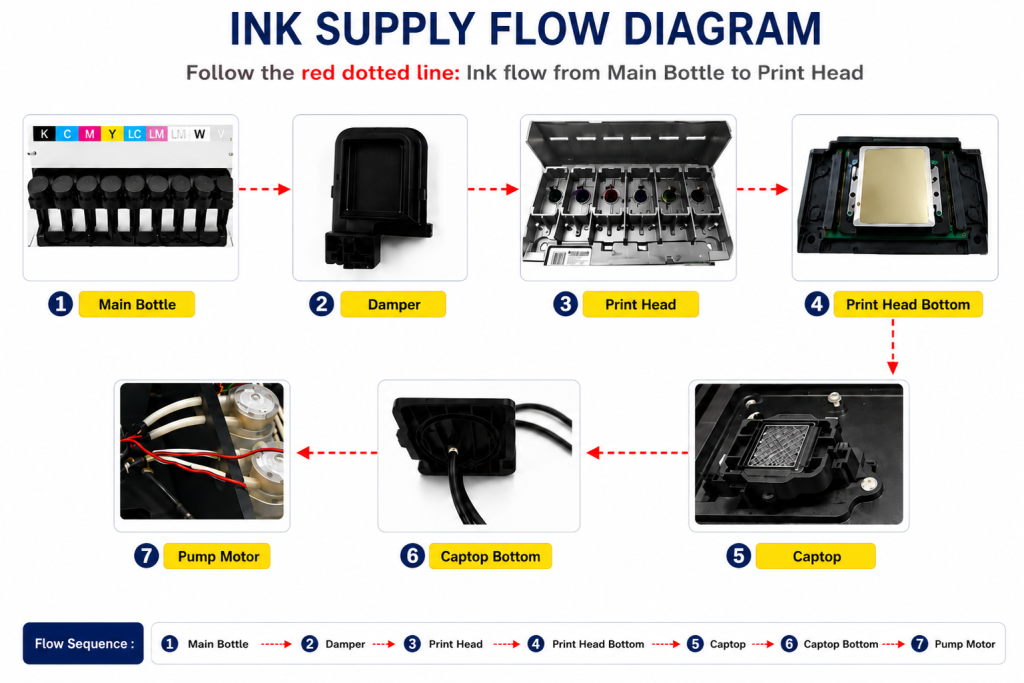
- When ink enters the Damper from the main ink bottle via the ink tube, it passes through the print head, flows to the captop, moves through the motor pump, and finally drains into the waste ink bottle.
- This article covers How to Replace a Motor Pump Tube in the full ink supply problem series.
- This follows Part 1 Captop Lower Tube, Part 2 How to Replace the Captop, Part 3 Damper, Part 4 Pump Motor and Yellow Tube, Part 5 Captop and Head Position, Part 6 Aligning the Captop and Head Position, Part 7 When the Capping Station Level Is Not Correct, Part 8 Captop Surface Drying, Part 9 Degraded Ink Inside the Captop, Part 10 Time for Ink to Fill the Damper, and Part 11 Ink Tube Burst.
II. Do I Need to Replace the Motor Pump? _ How to Replace a Motor Pump Tube
These are symptoms from a demo unit used for a year and a half.
- For the past three months, White cleaning had been working but not as thoroughly as before.
- When running the cleaning function, the rollers on top should rotate, but they weren’t spinning.
- Loosening the plastic cap slightly to the left and re-tightening it made the rollers start turning — and that’s how it was being used.
The assumption was that replacing the pump motor itself would fix the problem.
Eventually, even the cap-loosening trick stopped working. With motor pump replacement in mind, a closer inspection of the equipment began.
First, the pump motor itself was checked to see if it was functioning.
- The connected ink tubes were disconnected to expose the pump motor.
- As shown in the photo below, a screw-adjustable point was found inside the blue square on the bottom of the motor pump.
- Not knowing what it was, it was adjusted with a screwdriver while the power was on.
- The motor pump rotation speed changed — this turned out to be the speed control.
- The cross-shaped screw inside the blue square was turned to increase the motor pump speed.
- However, the rollers inside the cap still did not spin.
The initial assumption was that reduced pump speed was the cause, but:
- The pump motor responded normally to speed adjustment,
- and even at higher speeds, the rollers inside the cap wouldn’t rotate properly,
- so the pump motor was not the root cause.
The pump motor replacement plan was stopped, and the search for other causes began.

III. Why Won’t the Rollers Spin? _ How to Replace a Motor Pump Tube
For reference, the official name for this component is a peristaltic pump motor.
A closer observation began, one step at a time.

For testing purposes, the yellow tube (peristaltic pump tube) was removed from the cap, and the motor was run.
- The three rollers, engaged with the pump motor gears, only rotated in place — they did not rotate clockwise.
- With the yellow tube in place, the three rollers had rotated clockwise while pressing against the tube. Without the tube, they only spun in place.
- This pointed to the yellow tube as the root cause.
The long gears on top of the motor pump engage with gears inside the cap, causing the three rollers to spin in place only.

Why do the self-spinning rollers only rotate in place? Why won’t they rotate clockwise?
- The rollers can only spin on their own axis — they cannot rotate clockwise by themselves.
- For the rollers to rotate clockwise, they must make contact with the yellow tube (peristaltic pump tube).
- However, the yellow tube had shrunk over time, and because the rollers had no contact surface, they could not rotate clockwise.
- The problem was solved after replacing the tube, as shown on the right side of the photo below.

- Just because the tube looks fine from the outside doesn’t mean the tube inside the cap is okay.
- If the rollers won’t spin properly,
- if cleaning isn’t working properly,
- if pumping isn’t working properly,
- replace the yellow tube first.

IV. How to Replace the Yellow Tube (Peristaltic Pump Tube) _ How to Replace a Motor Pump Tube
Speed difference before and after replacing the yellow tube
With just one yellow tube replacement, the rollers start spinning cleanly.
After trying various methods, this is the easiest way to replace the yellow tube.
VI. ARTJET UV Printer

핑백: Why White Cleaning Doesn't Work Well - Printer Cleaning Issues Part 13 ARTJET 2026
핑백: Why it's important to replace the yellow tube and captop - Printer Cleaning Issues Part 14 ARTJET 2026
핑백: Head protection plate crumpled _ Printer Cleaning Issues Part 14 ARTJET 2026
핑백: Head protection plate cracked _ Printer Cleaning Issues Part 16 ARTJET 2026
핑백: White flies around the image - Printer Cleaning Issues Part 19 ARTJET 2026
핑백: When to replace the damper - Printer Cleaning Issues Part 20 ARTJET 2026
핑백: How to Find the Problem Color When the Color is Strange - Printer Cleaning Issues Part 21 ARTJET 2026
핑백: Printer Cleaning Problems Part 23 Table of Contents ARTJET 2026