UV Printer nozzle is normal, but a specific color is missing during printing — Ink Supply Problems (Part 17)
✅ Who Should Read This
- Anyone whose Lc or Lm intermittently disappears mid-print
- Anyone who has replaced the Damper, ink tube, Captop, and even the head, but the issue keeps coming back
- Anyone whose problem seems fixed right after replacing the Captop, only to return weeks later
- Anyone curious how the Capping station height setting can affect this kind of issue
⚠️ Precautions
- Because the symptom is intermittent rather than constant, tracking down the cause can take a long time
- Even if replacing the Captop seems to fix things temporarily, the problem can return if the root cause wasn’t addressed
- Setting the Capping station height too high improves cleaning, but it can accelerate Captop rubber wear and cause this exact issue
- Don’t jump to conclusions about ink degradation or ink shortage based on the symptoms alone
🧭 Key Summary (Field Insight)
- The cause: worn Captop rubber let a specific channel’s (Lm) nozzle touch the Captop felt, continuously draining the Damper while capped
- As the Damper emptied, printing ran fine at first on the residual ink, then that color dropped out partway through the print
- Replacing the Captop is only a temporary fix — the rubber weakens again over time and the problem recurs
- Real fix: lower the Capping station height value in the software (6→5) so the nozzle no longer touches the felt
📋 Ink Supply Problems — Full Series List
We are documenting ink supply problems in order. This list is updated with each new part.
03Damper
17When a Specific Color Drops Out During Printing
In our seventeenth look at ink supply problems, we cover a case where a specific color suddenly drops out mid-print.
This issue has come up several times on consumer sites — easy to fix once you know the cause, but quite frustrating if you don’t.
I. Background _ UV Printer nozzle is normal, but a specific color is missing during printing
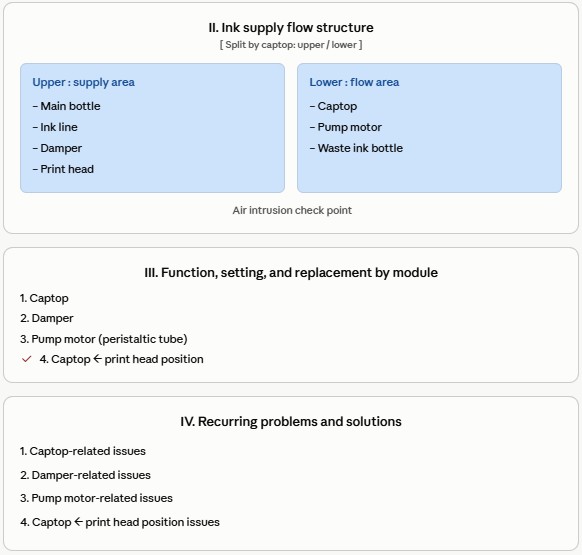
1. Full Table of Contents
2. Ink Supply Flow Diagram
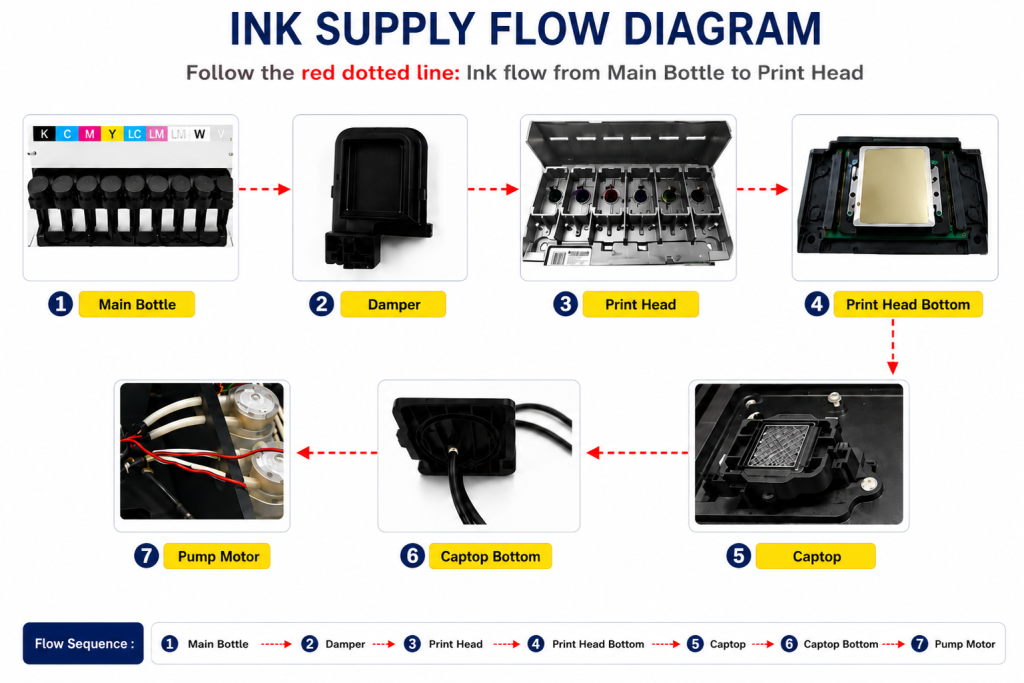
- When ink enters the Damper from the main ink bottle via the ink tube, it passes through the print head, flows to the captop, moves through the motor pump, and finally drains into the waste ink bottle.
- This article covers When a Specific Color Drops Out During Printing in the full ink supply problem series.
- This follows Part 1 Captop Lower Tube, Part 2 How to Replace the Captop, Part 3 Damper, Part 4 Pump Motor and Yellow Tube, Part 5 Captop and Head Position, Part 6 Aligning the Captop and Head Position, Part 7 When the Capping Station Level Is Not Correct, Part 8 Captop Surface Drying, Part 9 Degraded Ink Inside the Captop, Part 10 Time for Ink to Fill the Damper, Part 11 Ink Tube Burst, Part 12 How to Replace a Motor Pump Tube, Part 13 Why White Cleaning Doesn’t Work Well, Part 14 Why It’s Important to Replace the Yellow Tube and Captop, Part 15 Head Protection Plate Crumpled, and Part 16 Head Protection Plate Cracked.
- In this article, we explain a case that kept recurring even after replacing the Damper, ink tube, Captop, and head — and what the real cause turned out to be.
II. Problem Symptoms _ UV Printer nozzle is normal, but a specific color is missing during printing
We’ve seen plenty of White issues before, but this time it’s Lc or Lm not appearing at all during printing.
Everything else works fine.
- Ink load (pumping) is normal
- Print head cleaning is normal
- Nozzle pattern is also nearly normal after cleaning
When the color suddenly shifts mid-print and we stop printing to check,
- printing a nozzle pattern without cleaning shows Lc or Lm mostly missing,
- which looks similar to what you’d see with degraded ink or an ink shortage.
- The symptom doesn’t show up every time — sometimes it prints perfectly fine.
- But with nothing changed, ink drops out at other times,
- and once, we thought it was fixed after 5 clean prints — only to see it drop out again on the 6th.
💬 To give more detail on the test image printing,
- Printing an A3 test image unidirectionally, 5 times at 20 minutes each — normal
- On the 6th print, Light Magenta suddenly stopped appearing and colors shifted
- Cleaning and printing a nozzle pattern restored it to normal
- Printing again from there worked fine a few times, then Lm dropped out again and colors shifted
- Same symptom repeated no matter how many times we tried
III. What We Tested _ UV Printer nozzle is normal, but a specific color is missing during printing
We struggled with Light Magenta dropping out during printing for over a month. Because the symptom wasn’t consistent, it took a long time to track down the cause.
1. What we checked
Damper replacement
- Thinking “maybe the Damper is faulty,” we replaced it —
- problem not resolved.
Replacing the entire ink tube from the main tank to the Damper
- Wondering “could the ink tube have a tiny tear affecting supply?” —
- even though it’s tedious work, we replaced the whole ink tube from the main bottle to the Damper —
- problem not resolved.
Captop replacement
- “Could there be degraded ink left inside the Captop?”
- Since we’d seen something similar on a White ink Captop, we replaced it just in case
- The problem went away after replacing it,
- but the same problem came back two weeks later!
Print head replacement
- By this point, we’d replaced everything related to ink supply, from the ink line to the Damper and Captop.
- Finally, we decided to replace the head — the last gateway the ink passes through.
- Since this wasn’t a DATA-related issue, we didn’t expect replacing the head to matter, but we did it anyway just to rule it out.
- Sure enough, it wasn’t a print head problem.
IV. Cause and Solution _ UV Printer nozzle is normal, but a specific color is missing during printing
1. Thinking it through
Since replacing everything hadn’t solved it, we started organizing our thoughts step by step.
One clue stood out: “replacing the Captop keeps the same problem from showing up for a while.”
- We approached it as a Captop-related issue.
- This customer had installed two units together, and one had no issues at all.
- We closely compared the Captop from the working unit to the one on the problem unit.
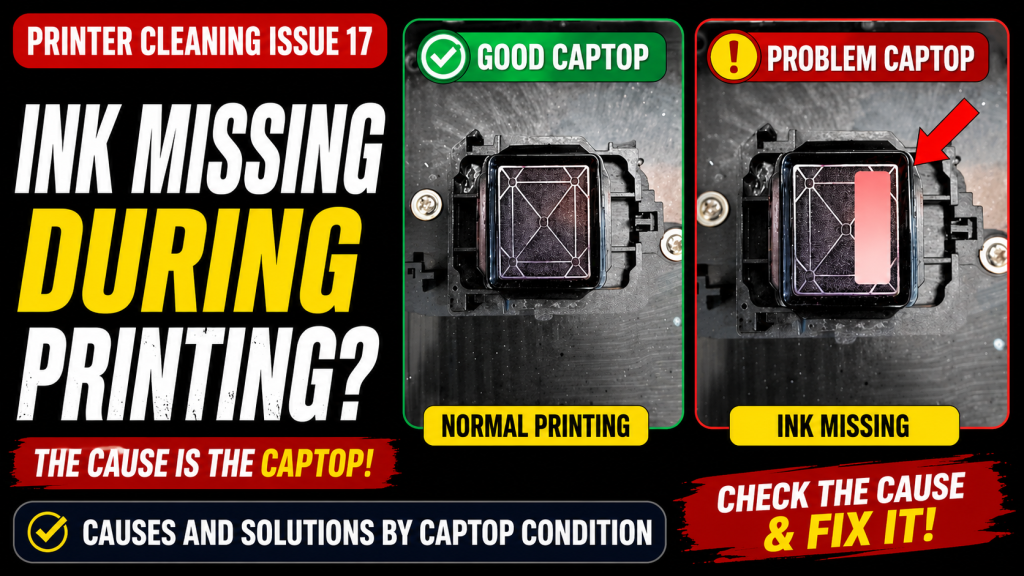
- On the normal unit’s Color Captop, the felt showed no particular color staining overall (left side in the photo below).
- On the problem unit, the color wasn’t spread evenly — instead, the right side was distinctly stained red.

2. “Why is it red?”
The red staining on the Captop’s right edge simply means one thing:
- Lm ink is continuously flowing through that spot.
- That continuous flow means the Lm nozzle is touching the felt inside the Captop, constantly drawing ink out of the head,
- and since the ink inside the head comes from the Damper, it means the Damper’s ink is also being continuously drawn out.
In other words, with the Lm nozzle touching the felt while capped,
- all the ink sitting in the Damper gets drawn out,
- leaving the Damper empty.
- Printing runs fine at first on whatever ink is left in the Damper,
- but partway through, the ink supply runs out and Light Magenta stops printing.
3. Solution
Here’s how capping works:
- The motor raises the entire capping unit,
- and the spring under the Captop lets it contact the print head’s underside gently,
- until the capping unit finishes rising and the spring fully compresses, creating a tight seal between the print head and Captop.
- Outside air is blocked at this point because the Captop’s black rim is made of elastic rubber.
As the Captop rubber weakens,
- setting the capping unit height too high seals the print head more tightly, which can help cleaning,
- but over time the Captop’s rubber blade gradually sags.
- Printing worked fine right after replacing the Captop because the fresh rubber blade kept the print head surface off the Captop felt.
- But as the rubber compressed and weakened over time, the print head nozzle started touching the Captop felt,
- and that’s when ink inside the Damper began leaking into the felt, causing the problem.
💬 A problem that stayed unresolved even after replacing everything was fixed instantly by changing a single number in the software.
— Lowered the Capping station height in the software from 6 to 5
— Lowered the Capping station height in the software from 6 to 5

V. UV Printer Basics · Troubleshooting · Product Guides
We have organized our UV Printer content below. Click an item to read the full post.
1) Ink Supply
23 articles on ink supply issues, including cleaning and pumping
2) Print Head Issues
12 articles on head-related problems, from replacement methods to symptoms
For deeper printhead study: Printhead Basics — 10 Articles
3) Electronics / Software Issues
4) Mechanical Issues
5) Sai Flexi RIP Installation, Spot Color, Troubleshooting
6) UV Printable Products — Full Summary
VI. ARTJET UV Printer
After selling and maintaining ARTJET UV printers for over 5 years, we have learned one vital lesson.
The most important factor next to product stability is accumulating troubleshooting data.
Problems can occur with any equipment depending on the environment, working conditions, and user skill level. What matters in the field is not “trouble-free equipment,” but:
How fast and how accurately you can find the cause and solve the problem when it occurs.
ARTJET continuously collects and organizes real-world problem data from the field to support faster and more accurate problem resolution.
🎥 View Print Quality Samples
🧾 Full List of UV Printable Products

* Note: Exterior design has been updated.
※ This article is based on actual field cases. Results may vary depending on the environment and equipment configuration.
핑백: UV Printer When to Replace the Damper ARTJET 2025
핑백: UV Printer Monday Head Cleaning ARTJET 2025