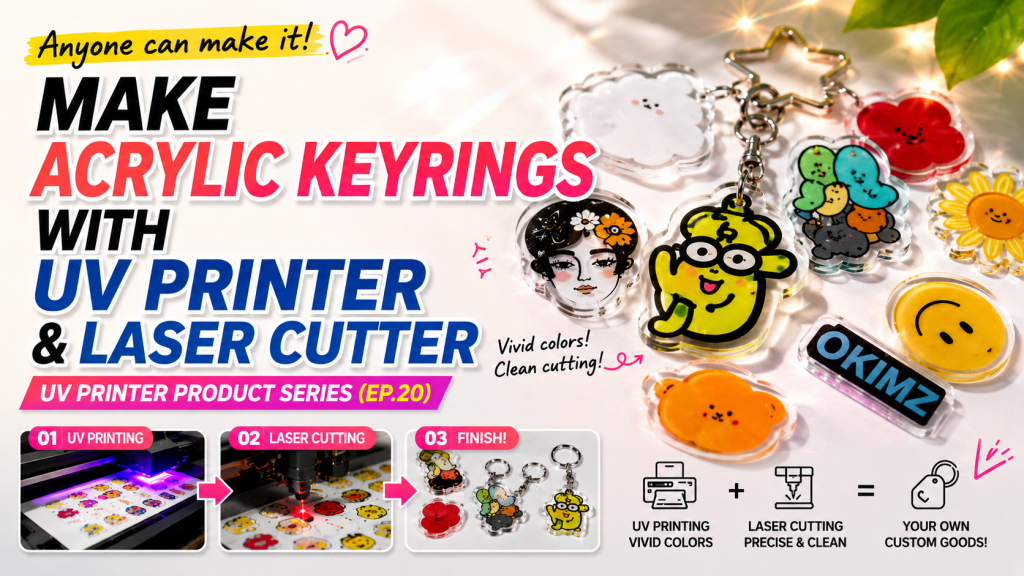
- Those looking to make acrylic keyrings using a UV printer and laser cutter
- Those curious about why acrylic lamination was introduced and its advantages
- Those wanting to understand Crop Mark camera cutting settings and equipment selection criteria for Chinese laser cutters
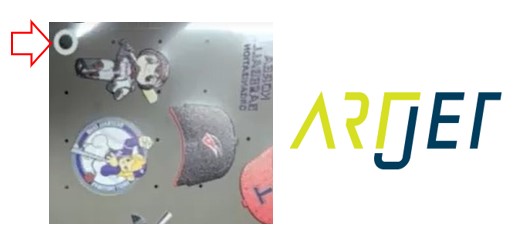
- Crop Mark circle diameter must be at least 5mm for proper camera recognition — 6mm is the standard in practice, and a minimum of 4–5 Crop Marks are needed
- If circular images are near the Crop Marks, the camera may misidentify them — maintain spacing between Crop Marks and images, or adjust the camera recognition range
- Fire during laser cutting is not a brand issue but depends on Power/Speed settings, air pressure, and acrylic material — cheaper acrylic is more prone to catching fire
- Acrylic Lamination → Back-side print on 2mm acrylic, laminate with 1mm blank acrylic — ink is no longer exposed, solving adhesion, contamination, and scratch issues while making print quality appear sharper
- Crop Mark Settings → Circle diameter 5–10mm (default 6mm), minimum 4–5 marks, recommended total image size within 300×600mm
- Chinese vs Premium Equipment → Cut angle, finish, and fire issues are matters of settings and acrylic material, not brand; Chinese cutters are sufficient for keyring cutting purposes
- Laser Cutting Difficulty → Can be learned in under 1 hour; beginners can perform camera cutting just by following the video
Today, we will explain how to make acrylic keyrings using a UV Printer and Laser.
I. Production Process — Making Acrylic Keyrings with a UV Printer and Laser
The production process is the same as the phone grip-tok. For details, please refer to the link below.
Making Phone Grip-Toks with a UV Printer and Laser
This section briefly explains acrylic lamination.
1. Before Acrylic Lamination was Introduced
- Until 2019, almost all companies made acrylic keyrings by
- back-side printing with Color, White, Color as 3 layers on 3mm transparent acrylic and selling them as-is.
- However, this method left the printed ink exposed, causing various problems.
- Occasionally, when printed images on acrylic were wiped with alcohol or cleaning agents, the ink would discolor or even peel off.
- Scratching with keys or fingernails also caused problems.
- Since these issues could not be resolved on their own, hard ink was used, and acrylic was either primer-treated or pre-treated to secure ink adhesion.
2. After Acrylic Lamination was Introduced,
- One company that was producing goods keyrings developed and began using an acrylic lamination machine.
- They back-side printed C, W, C on 2mm acrylic, laminated it with a blank 1mm acrylic, and completed the keyring with laser cutting.
- Since lamination prevents ink from being exposed, it resolved adhesion, contamination, and everyday scratch problems.
- Additionally, images viewed through front and back transparent acrylic appeared sharper in print quality.
- Other companies subsequently adopted acrylic lamination, and many companies now produce their final products using this method.
II. Laser Cutter — Making Acrylic Keyrings with a UV Printer and Laser
1. It’s Already Hard Enough to Operate a UV Printer — How Do I Handle Laser Cutting Too?
- After selling UV Printers for over 15 years, when we first brought in a Laser Cutting machine, we faced numerous challenges — poorly written manuals, installing the SW program, adding a camera, and installing the Crop Mark Cutting program.
- We were confident selling UV printers due to years of manufacturing experience, but after the many difficulties with the Laser Cutting machine, we decided not to sell them for the time being.
- After giving up on selling laser cutters, despite having the equipment, we never bothered to learn it.
- Whenever laser cutting was occasionally needed afterward, I couldn’t do it myself and asked an engineer to handle it.
- Then I finally committed to learning it, and in less than an hour, I was able to perform cutting on my own.
- The operation was simpler than expected.
- Since even I, who had been intimidated, could do it myself, I felt that anyone new to it could manage as well.
- That’s how the video below was created.
- If you’re new to laser cutting, just watching the video below will enable you to perform laser camera cutting right away.
- UV Printer+Laser Cutting — Making Acrylic Keyrings
- Most Chinese Laser Cutting machines use the RD Works program.
- If you follow the Laser Crop Mark Cutting section in the latter part of the video step by step, you will be able to perform Crop Mark Cutting.
2. Camera Cutting
- CCD, camera cutting, Dongbo cutting, and Crop Mark cutting all refer to the same thing.
- We will explain the important Crop Mark (black circle) used in camera cutting.
- If you are curious about how the laser cutter aligns and cuts after UV printer printing, please refer to the link below.
- How Laser Cutters Use Cameras for Alignment
2_1. Why Crop Marks Have White and the Proper Crop Mark Diameter
- In most cases, a black circle is placed on top of a wide white area.
- The camera mounted on the laser does not read both white and black — it only reads the black circle within the white area to recognize the position value.
- The surrounding white area is created so that the camera can easily recognize the black circle.
-
Making Acrylic Keyrings with a UV Printer and Laser - The black Crop Mark circle diameter can be set as needed,
- but for Chinese laser machines using the RD Works program, the Crop Mark circle diameter needs to be at least 5mm for reliable recognition.
- When tested up to a 10mm diameter, the camera recognized the Crop Marks normally.
- Based on test results, you can use any Crop Mark diameter from 5mm to 10mm as desired.
- For reference, most users use a 6mm circle diameter as the default.
2_2. Crop Mark Count and Crop Mark Placement
- Crop Mark Count — Even with only two, the camera can recognize and proceed with cutting.
- However, with only two Crop Mark recognitions, the camera error rate exists, causing the laser to cut inaccurately away from the designated position.
- To minimize this error range, a minimum of 4 Crop Marks are needed, and most operators use 5 Crop Marks as standard.
- Also, the larger the overall image to be cut, the higher the probability of cutting errors, so most operators use a standard total size of 300×600mm.
- One important precaution: if Crop Marks are too close to images and there are circular shapes nearby, the camera may misidentify circles in the image as Crop Marks, causing errors and displaying a message that Crop Marks could not be recognized.
- In this case, either mask the circular images on the acrylic print with masking tape,
- or maintain spacing between Crop Marks and images from the start to exclude the circular-looking images from the camera’s recognition range,
- or reduce the camera recognition range in the RD Works camera program to recognize only the Crop Marks.
3. Concerns About Chinese Laser Cutters
3_1. “American and German machines don’t catch fire when cutting acrylic, but Chinese Laser Cutting machines do”
- Opinions differ among users, but we have seen fire occur on German machines as well.
- This is related to laser cutting Power and Speed settings, and the air pressure applied during cutting.
- Naturally, the type of acrylic used also makes a difference.
- It is necessary to keep the bed surface clean where materials are placed to prevent fire, and also to adjust the air pressure during cutting.
- The acrylic used is truly important. We have seen fire occur frequently with cheaper acrylic. This applies regardless of whether the laser cutter is German or Chinese.
3_2. “American and German machines produce right-angle cuts, but Chinese Laser Cutting machines don’t”
- Whether cuts are at a right angle depends on the laser source angle, mirror alignment settings, and the flatness of the bed.
- This is determined by the skill level of the engineer who sets up the equipment.
- For premium equipment sellers, QC standards tend to be higher, so this issue is less likely to occur.
- When Chinese equipment is imported and sold without sufficient study, such situations may arise.
- The issue of not getting right-angle cuts is not a problem of being Chinese-made, but a problem of setup itself.
3_3. “American and German machines produce shiny and clean cut surfaces, but Chinese Laser Cutting machines don’t”
- This is a difference in laser cutting Power and Speed settings, and acrylic material.
- In particular, the acrylic material makes a huge difference.
- Some acrylics produce shiny cuts, but tend to occasionally catch fire during cutting,
- while others rarely catch fire, but the cut surface shows more visible grain.
- You need to test various acrylics to find the appropriate material.
3_4. “Advantages of American and German Machines”
- Budget Chinese machines use CO2 laser sources, and the laser power occasionally spikes in certain areas.
- For this reason, they may not be suitable for making precision assemblies with a laser, but they work fine for cutting purposes such as keyrings.
- In practice, we have seen users who use Japanese UV Printers but use Chinese laser cutters.
- Also, for engraving, it is better to use dedicated engraving equipment rather than doing it with the cutting machine.
- It is not so much a matter of Chinese-made versus German-made, but a matter of high-cost versus low-cost.
- Even in China, high-end equipment is capable of precision manufacturing.
III. ARTJET UV Printer
