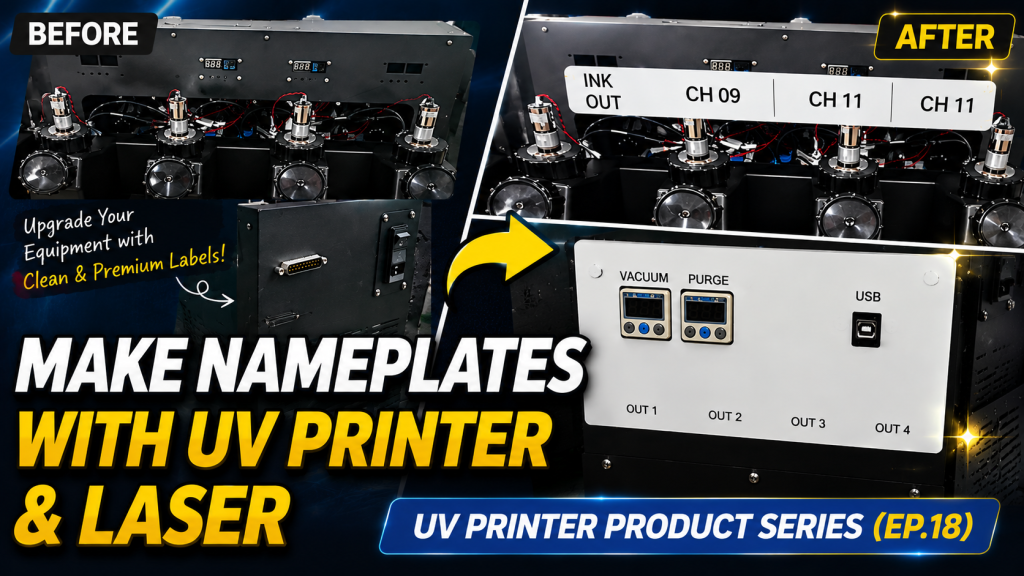
Making Equipment Name Plates with a UV Printer and Laser — Making Products with a UV Printer (Part 18)
✅ Who Should Read This
- Those looking to create acrylic equipment name plates (button labels) using a UV printer and laser cutter
- Those wanting to upgrade equipment appearance from adhesive sheet labels to premium acrylic name plates
- Those curious about the production process combining back-side printing on transparent acrylic with laser cutting
⚠️ Precautions
- Equipment name plates must be printed on the back side — front-side printing exposes the ink, making it vulnerable to scratches and chemical contamination
- Double-sided tape must be attached before laser cutting — cutting tape to fit individual pieces afterward is tedious, and the laser cuts both the acrylic and tape cleanly together
- A White Spot Layer must be included in the Ai file since transparent acrylic is used — without White, colors will not render properly on the transparent substrate
🧭 Key Summary (Field Insight)
- Production Steps → ① Set up 4 layers in Ai file (Crop Mark, Color, White Spot, Cutting) → ② Back-side UV print on transparent acrylic → ③ Attach double-sided tape → ④ Laser cut → ⑤ Attach to equipment
- Back-Side Printing Benefits → Text appears clean through the acrylic transparency, and ink is protected from scratches and chemical contamination
- Appearance Upgrade → Simply switching from adhesive sheet labels to acrylic name plates gives the equipment a premium, high-quality look
UV Printer Basics · Troubleshooting · Product Guides
We have organized our UV Printer content below. Click an item to read the full post.
1) Ink Supply
23 articles on ink supply issues, including cleaning and pumping
2) Print Head Issues
12 articles on head-related problems, from replacement methods to symptoms
For deeper printhead study: Printhead Basics — 9 Articles
3) Electronics / Software Issues
4) Mechanical Issues
5) Sai Flexi RIP Installation, Spot color, Troubleshooting
📋 Making Products with a UV Printer — Full Series List
We are documenting printing methods for various products. This list is updated with each new part.
18Making Equipment Name Plates with a UV Printer and Laser
We are explaining products you can make with a UV Printer.
Today, we will explain how to make equipment button name plates using a UV Printer and Laser.
Today, we will explain how to make equipment button name plates using a UV Printer and Laser.
I. Acrylic Name Plate Production Steps — Making Equipment Name Plates with a UV Printer and Laser
1. Ai File Preparation
- Since laser cutting is required, a total of 4 layers are needed.
- Crop Mark Layer for laser camera cutting
- Color print Layer for button function descriptions
- Since transparent acrylic is used, White is also included in the UV print — the White Spot Layer.
- And the Cutting Layer for laser cutting.
2. UV Printing
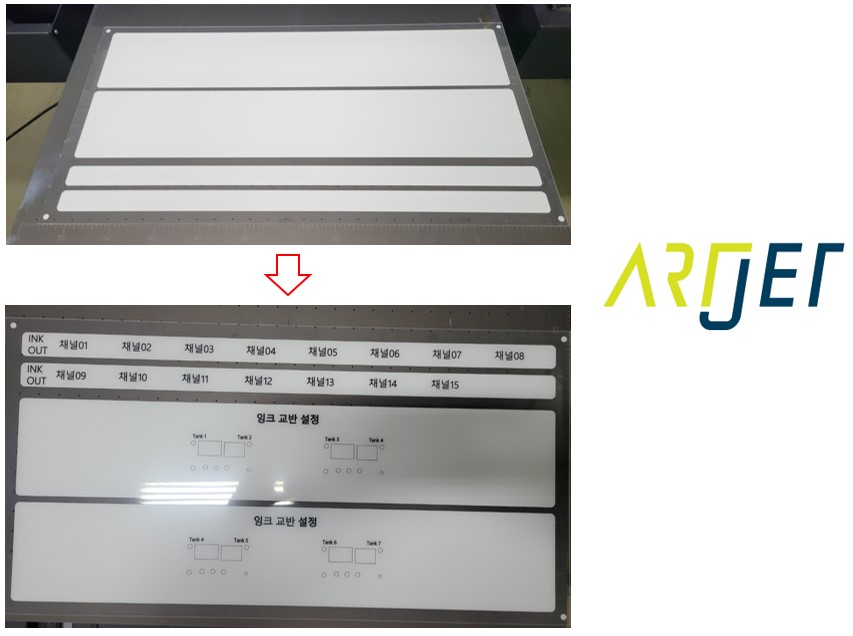
- First, White and Color are printed on the back side of transparent acrylic.
- In Illustrator, only the following 3 layers are activated and saved separately.
- Crop Mark Layer, Color Layer, White Spot Layer
- If equipment name plates are printed on the front side, the ink is exposed and can be damaged by scratches or chemical contamination.
- For this reason, back-side printing is performed on the acrylic.
- In the photo below, the upper image shows the back-side print, and the lower image shows the front view when flipped over.
-
Making Equipment Name Plates with a UV Printer and Laser
3. Attaching Double-Sided Tape
- Double-sided tape is used to attach the finished name plates to the equipment.
- However, if laser cutting is done first, attaching tape to the individual cut pieces requires trimming with a knife, which is tedious.
- For this reason, double-sided tape is attached before laser cutting.
- Attaching the tape before cutting makes the process easier, and the laser cuts both the acrylic and the tape cleanly together.
-

Making Equipment Name Plates with a UV Printer and Laser
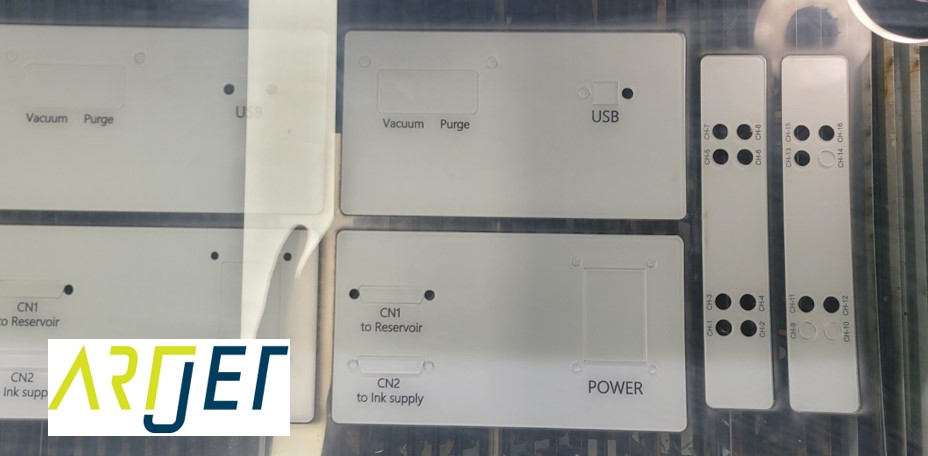
4. Laser Cutting
- For laser cutting, only the Crop Mark Layer and Cutting Layer are activated in Illustrator, and the Ai file is saved.
- The file is opened in the laser cutter program, and the printed acrylic is cut according to the cutting file.
- If you are unfamiliar with camera cutting, please refer to the article below for guidance.
- Explaining How to Perform Laser Camera Cutting
-
Making Equipment Name Plates with a UV Printer and Laser
5. Attaching Name Plates to Equipment
- Once cutting is complete, simply peel off the protective film from the double-sided tape on the name plates and attach them to the button positions on the equipment.
- Since the print was done on the back side of transparent acrylic, the text appears clean through the acrylic transparency, and the ink is not exposed, eliminating concerns about scratches or chemical damage.
II. Finished Equipment Name Plates — Making Equipment Name Plates with a UV Printer and Laser
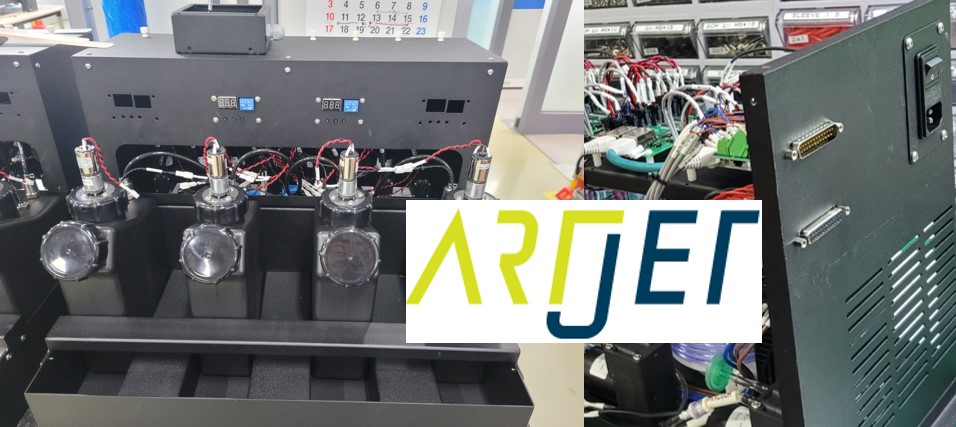
1. Before Attaching Name Plates
- This photo shows the equipment before the name plates were attached.
-
Making Equipment Name Plates with a UV Printer and Laser
2. After Attaching Name Plates
-

Making Equipment Name Plates with a UV Printer and Laser - This is an ink supply system that was independently developed at the company where I previously worked.
- When selling the equipment, button function descriptions were initially made with adhesive sheet labels.
- It was a high-end product developed through extensive research, but using adhesive sheets for button descriptions resulted in poor design and made the equipment look cheap.
- A premium look could have been achieved by changing the outer design and colors, but that would have required additional engineering and processing costs.
- So we decided to at least change the name plates.
- By switching the button name plates from adhesive sheet labels to acrylic,
- the thick acrylic with clean white backgrounds and crisp text created a neat, premium appearance.
III. ARTJET UV Printer
After selling and maintaining ARTJET UV printers for over 5 years, we have learned one vital lesson.
The most important factor next to product stability is accumulating troubleshooting data.
Problems can occur with any equipment depending on the environment and user skill. What matters in the field isn’t “trouble-free equipment,” but:
How fast and how accurately you can find the cause and solve the problem when it occurs.
ARTJET continuously collects and organizes real-world problem data from the field to support faster and more accurate problem resolution.
🎥 View Print Quality Samples
🧾 Full List of UV Printable Products

* Note: Exterior design has been updated.
※ This article is based on actual field cases. Results may vary depending on the environment and equipment configuration.