- Anyone trying UV printing on canvas (with wooden frame) for the first time
- Anyone deciding whether to print first and stretch later, or print directly on framed canvas
- Anyone experiencing print defects caused by warped wooden frames or sagging canvas
- Anyone looking for tips to print clean edges on canvas frames
- Anyone wanting to solve overly dark or heavy color output on canvas
- Printing on loose canvas first and stretching later is not recommended. Canvas is porous, difficult to hold by vacuum/fan, and may rise from UV heat and strike the head.
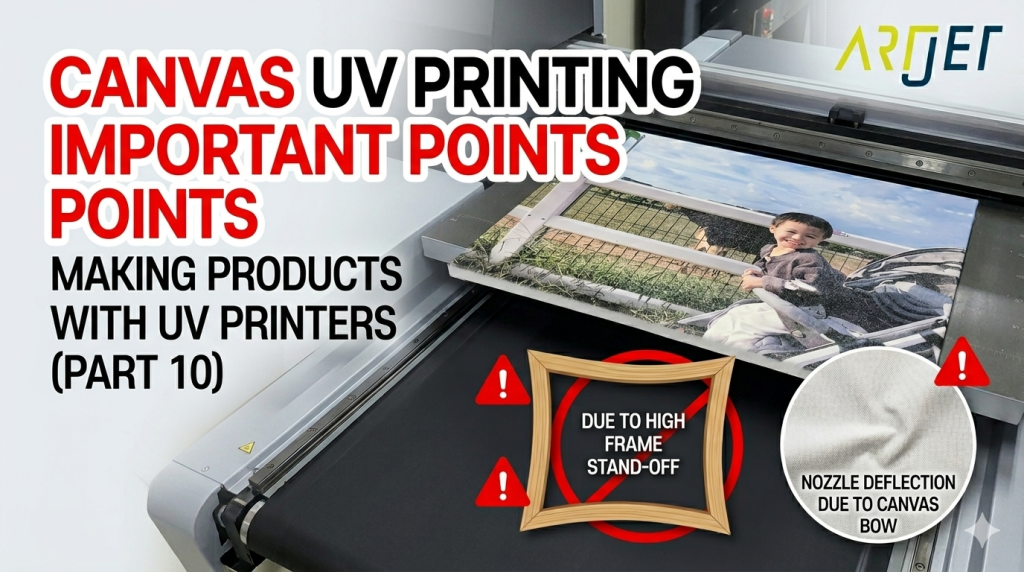
- If purchasing pre-framed canvas, check wooden frame warping first. Raised sections can hit the print head.
- Areas without wood support may sag downward, increasing head gap. Support those areas with equal-height material.
- Canvas coating is slightly glossy, so colors may print darker. If shadows plug up, reduce density slightly.
- The safest option is to print on pre-framed canvas.
- Check frame warping, and support sagging center areas.
- For clean edges: make image about 3mm larger → apply masking tape → place dummy substrate beside frame → remove tape after printing.
- Because of canvas coating, colors print richer. Use the normal profile but reduce overly dark areas if needed.
- Even smartphone photos can print sharply at 1:1 scale.
Today, we will cover precautions and practical tips for printing on canvas.
I. Canvas UV Printing Precautions
1. Print on plain canvas first, then stretch it onto a frame later?
If you plan to print on canvas first and then build the wooden frame afterward, this is generally not recommended.
Canvas is porous material, so it does not stay flat easily on a UV flatbed printer using vacuum or fan suction.
1-1. If you still choose to print on loose canvas first:
- You must place the canvas on the flatbed, stretch it tightly, and tape all four edges.
- Since edge areas must stay flat, taping itself takes time.
- Even after securing it, UV heat during printing may cause the canvas to rise slightly.
- When this happens, the lifted canvas may strike the print head during printing.
1-2. Even if printing succeeds, frame assembly creates another challenge:
- When stretching printed canvas onto a wooden frame, some areas may be pulled tighter than others.
- This can distort the image.
- It is also difficult to align the printed image perfectly with the outside edges of the frame.
2. Use pre-framed canvas instead
Long ago, framed canvas was not easy to find, but now pre-framed canvas can be purchased online.
After purchase, the first thing to check is whether the wooden frame is warped.
2-1. If the wooden frame is warped:
- When placed on the printer bed, one side may sit higher than expected.
- If printing with a 1.2mm head gap, raised sections may collide with the head.
- You cannot simply tape the top surface because the full surface must be printed.
- Usually the only option is to apply masking tape on the side of the frame and secure from there.
- Always inspect framed canvas for warping before production.
2-2. Areas without wood support may sag downward
- Even tightly stretched canvas may sag slightly in the center section.
- This increases the head gap beyond the ideal setting.
- As a result, print quality may become weaker in that area.
- Use support material with the same height as the frame underneath the center area.
- This helps maintain even print quality across the full canvas.
3. How to print clean frame edges
Even if your print position is accurate, wooden frame sizes are rarely 100% identical.
One canvas may align perfectly.
The next may shift slightly right.
Another may shift left and overspray onto the side edge.
3-1. Common method used by experienced operators:
- Place the framed canvas on the flatbed.
- Apply masking tape evenly around all outer edges.
- Prepare the artwork slightly larger than the actual frame size.
- Any overspray beyond the frame would normally dirty the flatbed.
- To reduce this, place dummy material beside the frame at matching height.
- After printing, remove the masking tape.
- This leaves a much cleaner printed edge.
4. Color advice
- Canvas often makes colors look richer and stronger.
- The base tone of canvas itself may influence some colors.
- The coating layer is slightly glossy, which can increase visual contrast.
- Use your standard profile first.
- If dark areas become too dense and details disappear, reduce density slightly before printing.
- For color tuning tips, see the guide below.
- Color adjustment tip article
II. Real Canvas Printing Example _Canvas UV Printing Precautions
1. Image File
Smartphone camera quality has improved greatly.
Even mobile photos can print sharply when used at 1:1 size.
We received the image through KakaoTalk and processed it at 1:1 print size.

2. Actual Printing
- We used pre-framed wooden canvas.
- Before printing, we first checked whether the frame was warped.
- Fortunately, it was straight.
- This frame was stretched tightly enough that no center support was required.
- The artwork was prepared about 3mm larger than the actual frame size.
- The frame was placed on the flatbed and masking tape was applied to side edges.
- Printing was completed.
- After printing, the masking tape was removed.
- The result is shown below.

III. ARTJET UV Printer
