Solid Color Banding Fix Tips (Horizontal Lines) _ Printhead Issue #7 _ ARTJET 2026
• Horizontal line banding appears only in areas with heavy use of a specific color (e.g., Cyan)
• You need to confirm whether it’s a nozzle/aging issue or a channel/operation issue before replacing the head
• You’re considering a temporary workaround (Channel Swap) before a full printhead replacement
• After swapping: Ink Load (Pumping) → Cleaning → Nozzle Test → Test Print is mandatory
• If you forget to update the channel order in the software, you may get incorrect colors
• This is a temporary workaround; if the head is aged, a printhead replacement may be required
This case is a temporary improvement example for horizontal line banding that appears when printing certain solid colors.
The Nozzle Test looked mostly fine, but during actual solid color printing, banding appeared in areas dominated by a specific color (Cyan).
This was identified as a symptom of reduced nozzle condition and printhead aging.
Instead of replacing the head immediately, we confirmed that banding can be reduced by swapping the Cyan channel with the Light Cyan channel (Channel Swap operation).
However, this is a workaround. If nozzle condition continues to degrade, a printhead replacement will be necessary.
So far, I’ve organized the UV printer topics below. Click each title to open the related post.
- Print Head Basics (9 posts)
- Real Head Issues & Fixes (12 posts)
- Mechanical Issues & Fixes (10 posts)
- Electronic Boards and Software Issues(12 posts)
- SAi RIP Installation / Basic Settings / Spot Color & Fixes (11 posts)
- Complete List of Products You Can Make with a UV Printer
If cleaning/pumping doesn’t work properly, or prints fail during printing, you can approach troubleshooting from two directions.
1) Ink Supply
- Ink supply-related print errors (including cleaning and pumping issues) were recently updated.
- If your printer uses dampers, you can solve many of these issues using the guide below.
- This is a 23-post table of contents with photos. Click each item inside the link to open the post.
- Printer Cleaning Problems Part 23 Table of Contents ARTJET 2026
2) DATA-related issues (board, printhead, DATA cable, etc.) — currently being updated
- Part 1: Symptoms & Fix When a DATA Cable Is Contaminated by Ink
- Part 2: 17 Stored Used Heads: How Many Worked After Alcohol Cleaning & What Errors Appeared
- Part 3: A Specific Color Prints Abnormally During Printing
- Part 4: How to Print on Reflective Materials + More Dangerous Causes That Can Clog Nozzles
- Part 5: Real Case: Reviving a White Head Not Used for One Month
[Click here for the “clogged white head” recovery method] - Part 6: Symptoms when a printhead reaches end-of-life and how to swap heads
Today, banding may not be visible when printing normal images,
- but it becomes visible when printing certain solid colors.
- I’ll explain why this happens and share a practical tip to reduce banding on those solid colors.
- If your printer has a similar function, the same idea may apply.
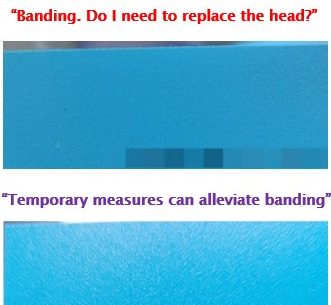
I. Symptoms and Results After the Fix _ Solid Color Banding Fix Tips
1. Symptom
I printed a blue solid color.
- As expected, a lot of Cyan ink was used.
- If you look closely, you can see thin horizontal lines along the X-axis print direction.
- This is what I’ll call “banding” (horizontal line banding).
This happens when one or two Cyan nozzles are missing, or when nozzle firing becomes unstable (angled/sprayed firing).
It is a symptom of printhead aging.
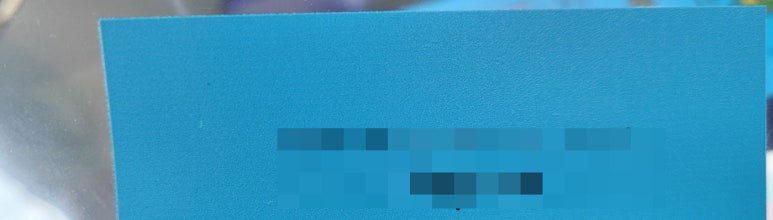
2. Result After the Fix
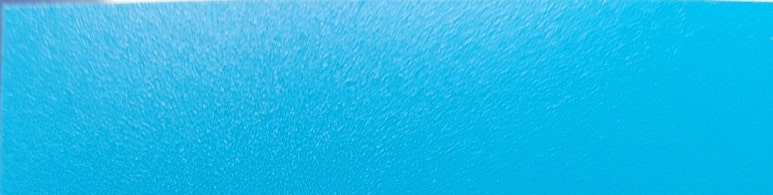
Without replacing the printhead, we improved the banding as shown below.
- This result was achieved by swapping the Cyan channel (poor nozzle condition) with another channel in better condition.
- Ideally, the head should be replaced. But if you don’t have a spare head available, you can reduce visible banding by swapping channels.
II. How to Swap Color Channels _ Solid Color Banding Fix Tips
If you use an Epson-based UV printer, I assume a similar function may exist.
1. Why banding happens
As shown below, when one or two nozzles are missing in the printhead (or firing becomes angled/unstable),
banding appears when printing a solid color that heavily uses that color.
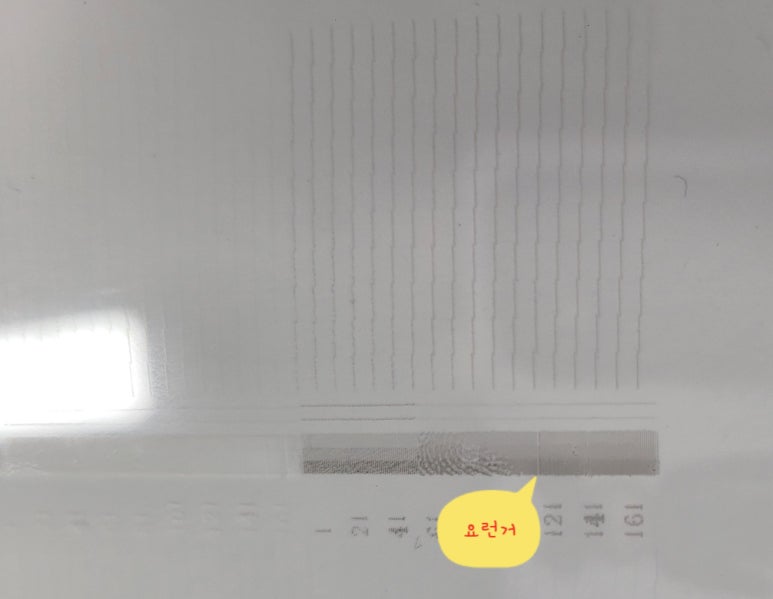
When printing normal images, multiple colors are mixed, so banding is less noticeable.
But in images dominated by a specific color, missing/unstable nozzles become clearly visible as banding.
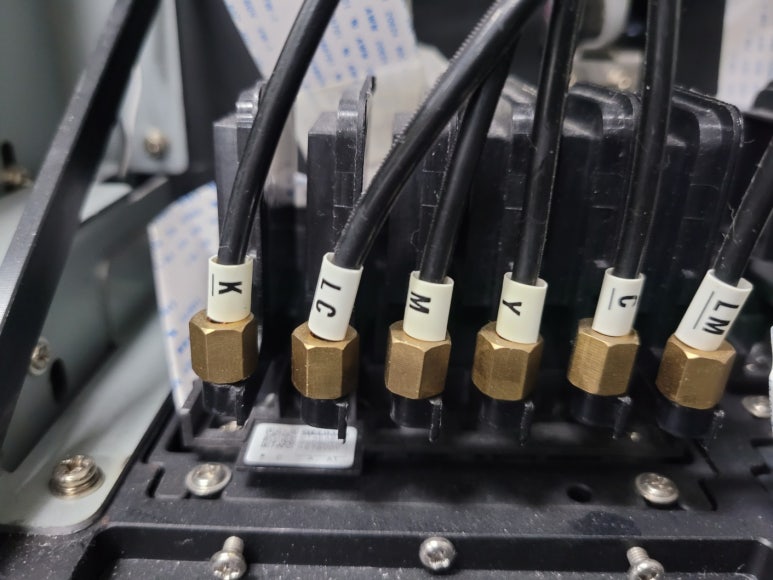
2. Damper Swap
Before: Damper order was K C M Y Lc Lm.
After swap: it becomes K Lc M Y C Lm.
- Since banding appeared in the Cyan channel, we swapped Cyan with Light Cyan (which had better nozzle condition).
- Light Cyan was moved to the Cyan position.
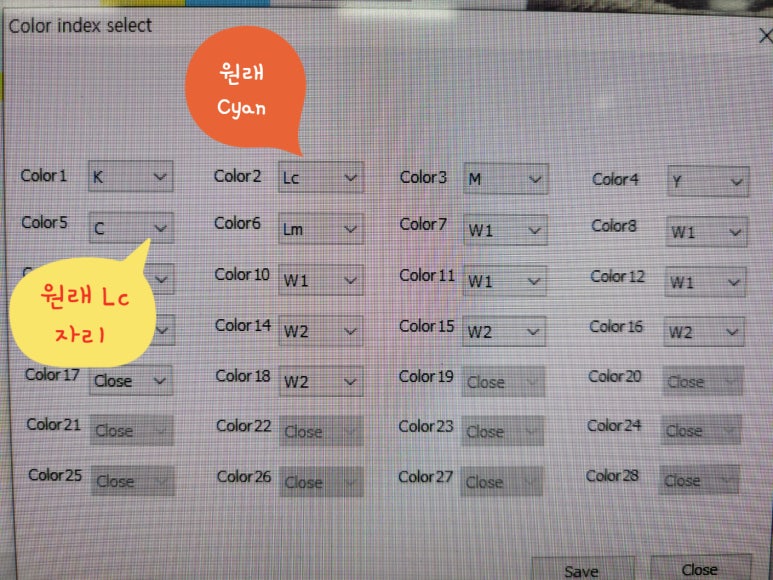
3. Update the Channel Order in the Software
In the software, update the channel order to match the new damper positions:
K C M Y Lc Lm → K Lc M Y C Lm
4. Ink Load (Pumping) and Cleaning
When you change damper positions, the ink inside the printhead must be replaced via Ink Load (Pumping) so the head is filled with the new ink.
Ink Load (Pumping): after ink starts coming out into the waste tank, keep it for about 10 seconds, then stop.
After Ink Load (Pumping), make sure you do the following before printing:
- Run printhead cleaning
- Run a Nozzle Pattern Test to confirm the ink swap is applied correctly
- Print an ARTJET test file to confirm output is stable with the swapped ink
III. Why Light Cyan Was Chosen for the Swap _ Solid Color Banding Fix Tips
“Won’t banding appear in Light Cyan as well?”
- Yes. If you print a color that heavily uses Light Cyan, banding can appear in the same way.
- However, Light Cyan is a supporting color for Cyan, so it is generally used less than Cyan.
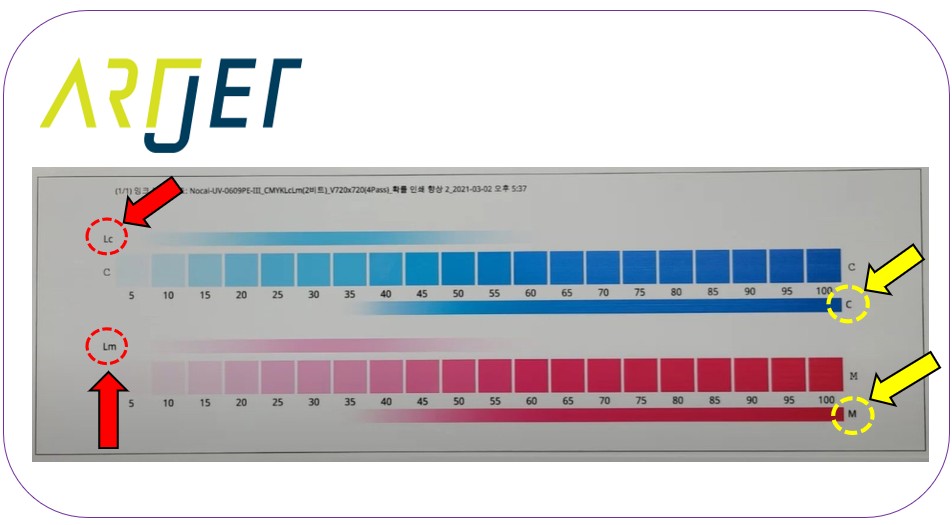
- Lc and Lm are light support colors used to reproduce light Cyan and light Magenta tones that CMYK alone cannot express well.
Light Cyan usage range
- When printing a 0% to 100% Cyan (or Magenta) gradient from an Ai file:
- 0%–35%: only Light Cyan ink is fired
- 35%–55%: Light Cyan + Cyan ink fire together to 표현 gradient
- 55% and above: only Cyan ink is fired
- Since Light Cyan is used less overall than Cyan, banding is typically less noticeable even if one nozzle is weak or firing is angled.
- That’s why Light Cyan was selected as the swap channel.
However, if the solid color is mainly Light Cyan (a very light Cyan solid), banding may still appear in that color.
This method is a workaround. If the issue does not improve, the printhead should be replaced.
For how to replace the head by disconnecting only the head-side cables (without removing cables from the board), refer to the link below.
IV. ARTJET UV Printer
Based on over five years of sales and maintenance experience with ARTJET UV printers, one key lesson stands out:
After product stability, the next most critical factor is troubleshooting data.
Every product can encounter issues — whether caused by equipment conditions or user operation.
In real production environments, product reliability depends on how quickly and efficiently those issues can be identified and resolved.
ARTJET continuously collects and organizes real field troubleshooting data to support faster and more accurate problem resolution.
You can view print quality samples here:
[Print quality sample by video]
You can view ARTJET pricing and sales conditions here:
(Note: Exterior design has been updated)
You can also review a complete list of products that can be produced using UV printers here:
[UV Printable Product Guide]
