
- Anyone seeing countless grain-like streaks on the Varnish surface after printing
- Anyone getting a Matt finish when they want a Glossy Varnish effect
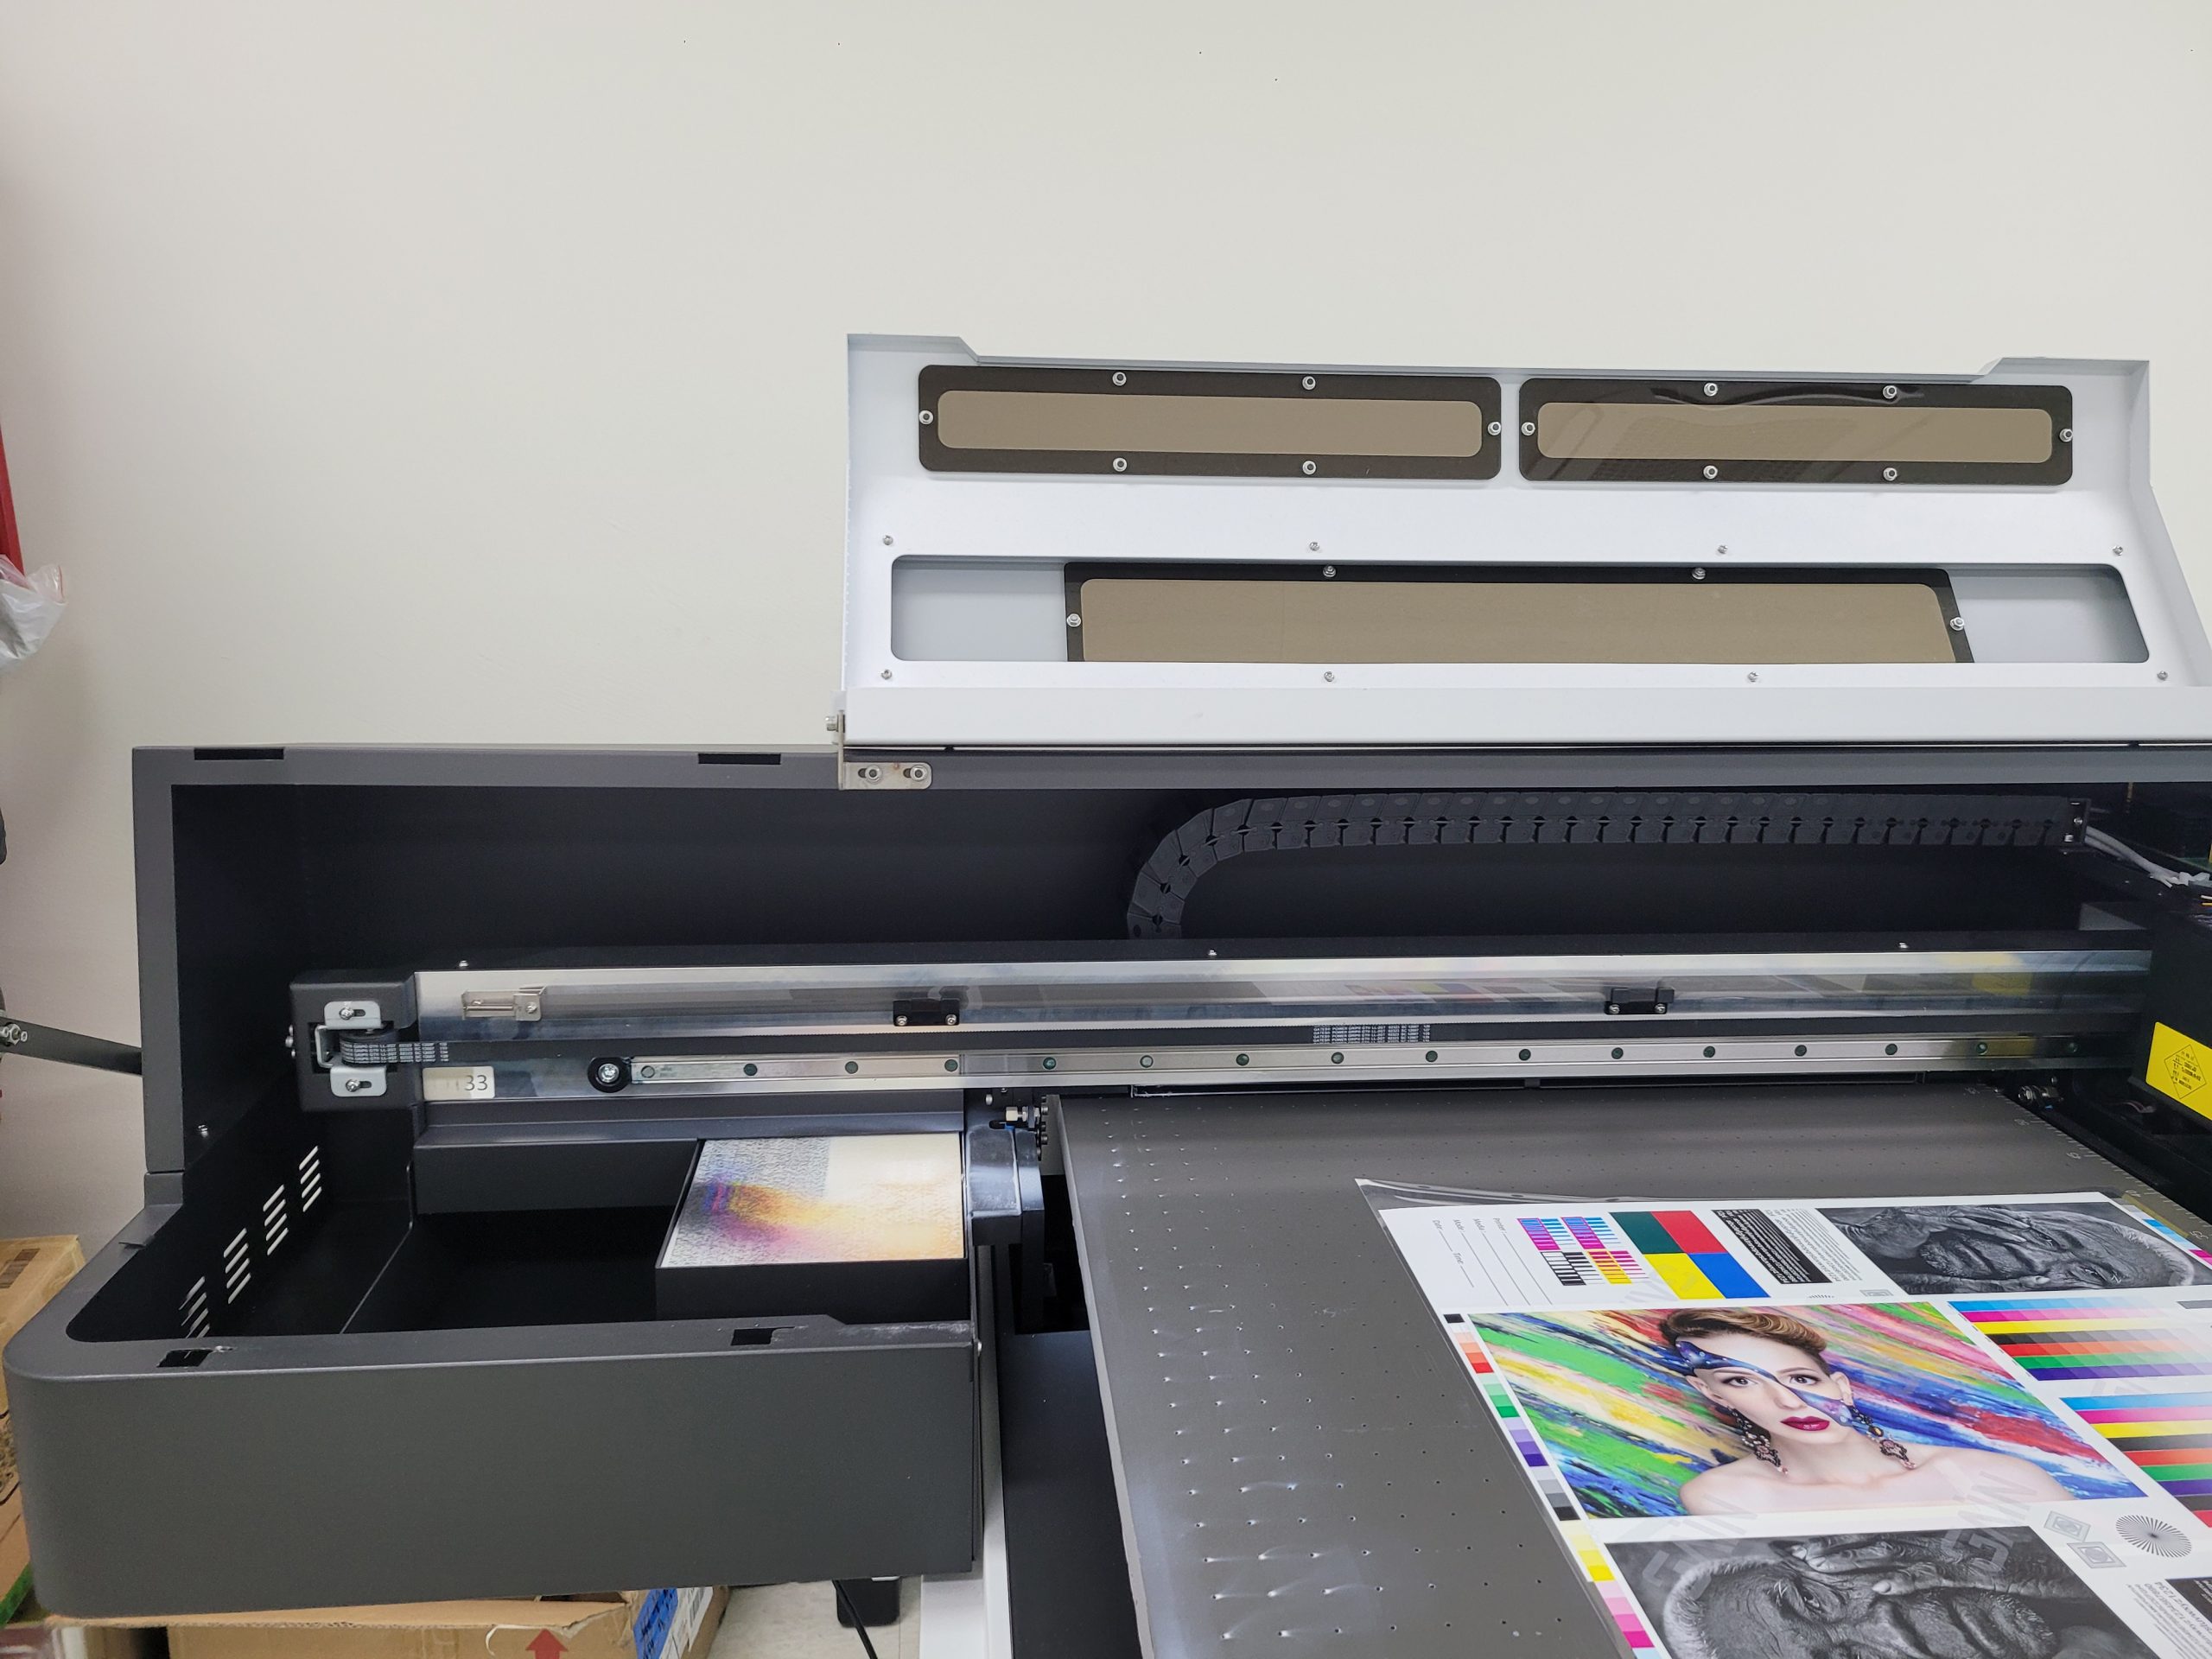
- Anyone using a UV printer that has a dedicated Varnish lamp
- This method does not apply to printers without a dedicated Varnish lamp
- When repositioning the lamp, the left cover must be removed — failure to do so may cause the carriage to strike the cover during printing
- Lamp repositioning involves mechanical adjustment — do not apply excessive force
- No dedicated Varnish lamp → No solution available, no need to read further
- Dedicated lamp available → Set lamp to Position 1 + Varnish density at 40%
- Always confirm left cover is removed before proceeding
I. Symptoms & Tips — How to Reduce Varnish Banding
1. Is Varnish Grain Inevitable?
After printing, the Varnish surface shows countless unexplained streaks like the image below.
If your UV printer has a dedicated Varnish lamp, the banding can be reduced. If it does not, there is no available fix.
When UV Lamps Were Expensive
- Before Chinese-made UV lamps became common, only the US and UK produced UV lamps.
- Due to the high cost, a separate lamp dedicated to curing Varnish could not be installed, limiting Glossy expression.
- Although Varnish is a transparent ink, it needs to spread and form a surface after landing on the substrate in order to appear Glossy.
- Without a dedicated Varnish lamp, the lamp mounted next to the head would cure the Varnish the moment it landed — before it had a chance to spread.
- As a result, the Varnish hardened before forming a proper surface, producing only a Matt finish instead of Glossy.
Achieving Glossy Effects When Lamps Were Expensive
- The standard method cured Varnish immediately upon landing, resulting in only a Matt finish.
- To achieve Glossy results, the printing technique was modified through software.
- The head carriage would make 4 passes with the UV lamp turned Off, allowing the Varnish time to spread, then on the 5th pass the lamp would turn On to cure it — creating a Glossy effect.
- However, each time the lamp cured the Varnish on the 5th pass, a band-like line appeared at each interval, which was still a limitation.
With the Arrival of Affordable LED Lamps
- As Chinese-made LED lamps became widespread, lamp costs dropped significantly, allowing UV printers to include a dedicated Varnish lamp.
- The old software technique of printing 4 passes then curing once was no longer necessary, and banding could now be minimized by adjusting the Varnish lamp position.
- Even with a dedicated Varnish lamp, incorrect settings will still produce the heavy banding shown in the photo above.
2. Minimum Conditions for Reducing Glossy Varnish Banding
UV printers with a dedicated Varnish lamp can minimize Varnish banding using the following conditions.
Based on test results, banding was minimized with the lamp at Position 1 and Varnish density set to 40%.

Varnish Lamp Position
- The Varnish lamp assembly allows for slight positional adjustment.
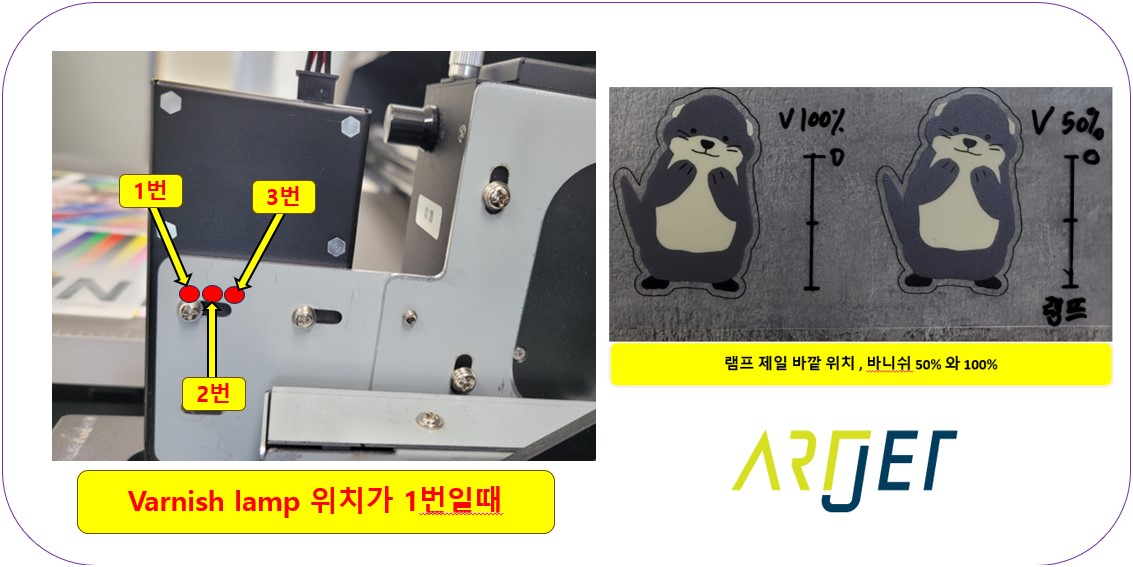
- In the diagram above, Position 1 produced the least banding.
Varnish Density
- Go to [Menu] → [Spot colors setting] to open the settings panel shown on the right side of the diagram above.
- Varnish density can be adjusted at the bottom of this panel.
- Setting Varnish density to 40% produced the least banding.
Note: When repositioning the Varnish lamp (angled 10 degrees outward, making it physically larger than before), the left cover must be removed due to lamp interference. Failure to do so risks the carriage striking the cover during printing.
II. Test Process — How to Reduce Varnish Banding
1. Varnish Lamp Position Test
Testing was conducted with two variables to minimize Varnish banding:
- Banding by lamp position
- Banding by Varnish density
The following covers test results by Varnish lamp position.
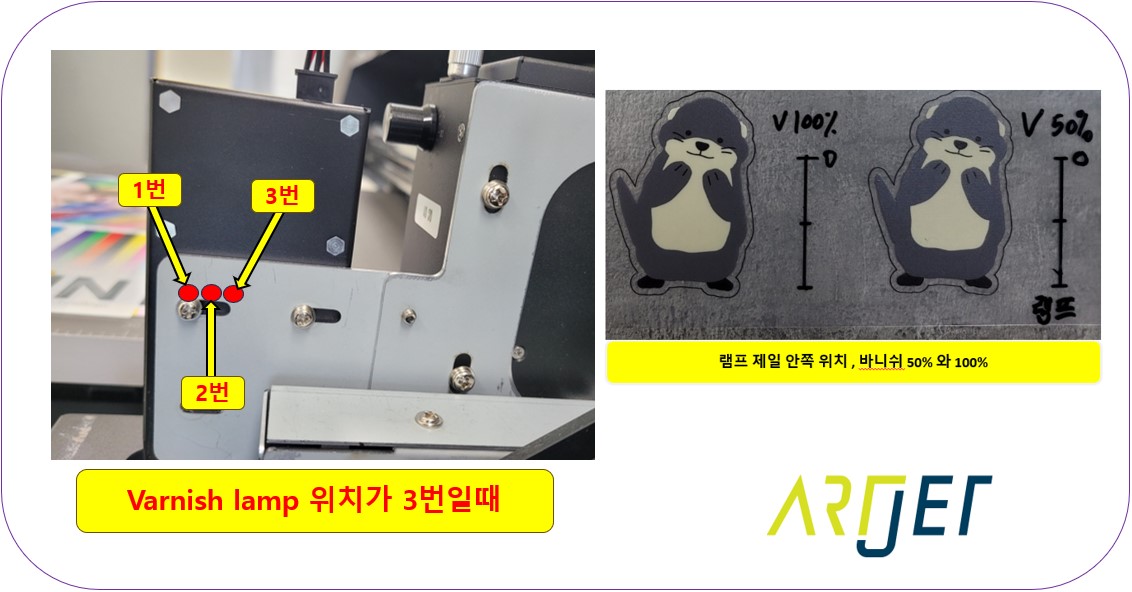
1. Lamp Position 3
- This position gives Varnish the least amount of time to spread after landing.
- Compared to Positions 1 and 2, the shorter spread time results in a Matt rather than Glossy finish.
- Under light, banding was minimal — but with no Glossy effect, a different condition was needed.
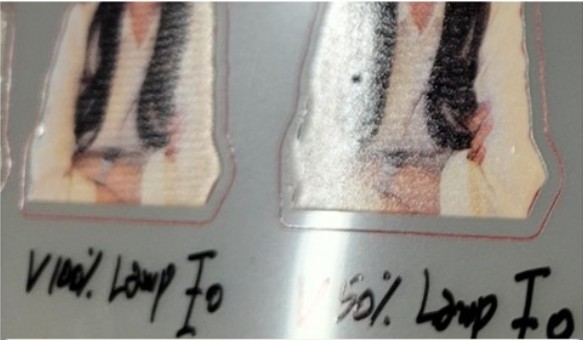
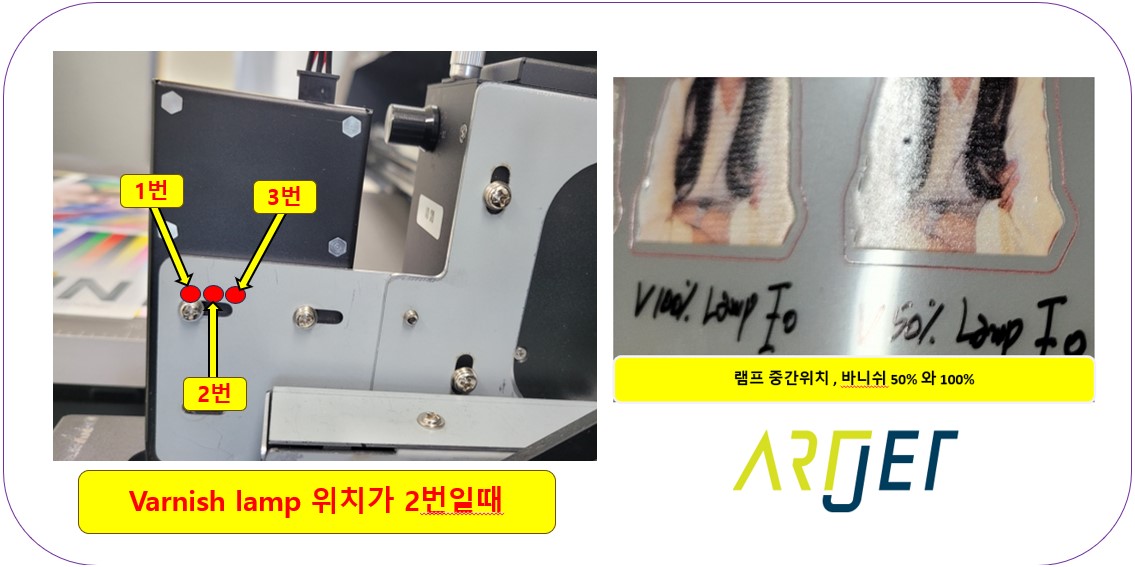
2. Lamp Position 2
- Gives the Varnish more time to spread, producing a Glossy appearance.
- However, test results showed heavy banding at both 50% and 100% Varnish density.
- Glossy effect was present but banding was too severe — a different condition was needed.
3. Lamp Position 1
- Banding was significantly reduced and the Glossy effect was the best of all positions.
- Lamp Position 1 was confirmed as the optimal setting and fixed at this position.
2. Varnish Density Test at Lamp Position 1
Varnish density was tested in 10% increments from 10% up to 100%.
- Shining light on the Varnish surface makes banding more visible,
- so the goal was to find the density with the least banding under this worst-case lighting condition.
- Results showed minimal banding at 30%, 40%, 50%, and 60% — with 40% confirmed as the optimal value.

Click the link below to watch a full video walkthrough of everything covered in this article.
III. ARTJET UV Printer
