
When Printhead DATA Cable Is Connected Incorrectly
(Head Issue #8) _ARTJET 2026
✔ Anyone struggling because a specific color won’t print after a head replacement
✔ Cases where the nozzle test looks “normal,” but printing fails in real jobs
✔ Users who find it difficult to distinguish between DATA cable / printhead / board issues
✔ Anyone who wants to avoid unnecessary printhead replacement costs
✔ Results may not be 100% identical across all machines and environments.✔ Any DATA cable work must be done with ALL power turned OFF.
✔ Working while powered ON may damage:
→ the head board
→ the printhead
→ the DATA cable
✔ Symptoms that look like a printhead failure can actually be caused by a DATA cable connection issue.
✔ Especially when the nozzle test is not completely broken, but you see:
→ only one specific color printing weakly, or
→ thin bars in the nozzle pattern for a specific color
You should check the DATA cable alignment/connection first.
✔ In some cases, you can solve the issue without replacing the printhead—simply by re-checking the DATA cable.
For printers that use dampers, you can troubleshoot using the link below.
This is a 23-part index with photos. Click each item in the index to open the related post.
- Part 1: Symptoms & Fix When a DATA Cable Is Contaminated by Ink
- Part 2: 17 Stored Used Heads: How Many Worked After Alcohol Cleaning & What Errors Appeared
- Part 3: A Specific Color Prints Abnormally During Printing
- Part 4: How to Print on Reflective Materials + More Dangerous Causes That Can Clog Nozzles
- Part 5: Real Case: Reviving a White Head Not Used for One Month
[Click here for the “clogged white head” recovery method] - Part 6: Symptoms when a printhead reaches end-of-life and how to swap heads
- Part 7: Why banding appears only on certain solid colors + tips to reduce it
I. Symptoms — When Printhead DATA Cable Is Connected Incorrectly
1) Typical symptoms of an incorrect DATA cable connection
▶ Video placeholder (insert your video here)
If the DATA cable between the printhead and the board is connected incorrectly, you may see:
• Even if the board LED blinks, the software connection may still appear normal
• However, the nozzle test shows no patterns on all three heads
• During actual printing, no ink is fired at all
• If left in this state for a long time, the head board can be damaged
Printing runs, but no ink is fired from the whole head (Cause & Fix) (Link)
2) Symptoms in this case
In this case, the typical board LED blinking did not appear.
At first glance, the nozzle pattern also looked normal.
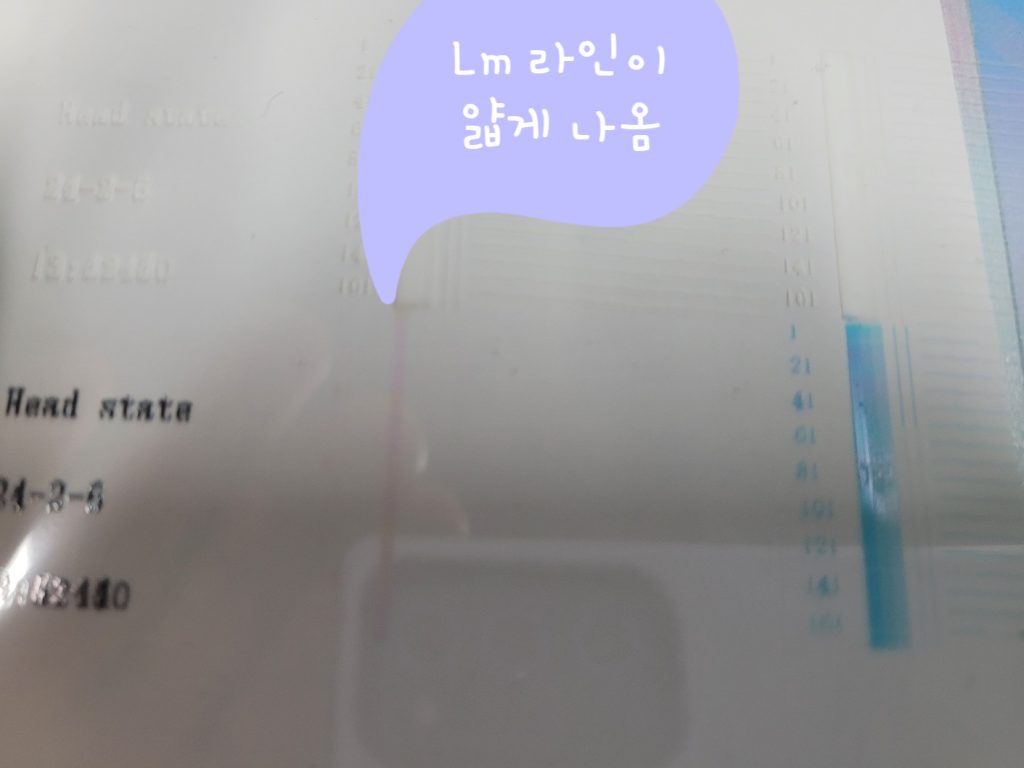
However, during printing, Light Magenta data did not fire.
After checking the nozzle pattern carefully, I found the Light Magenta bar was printed thin.
Since the machine was printing normally just 30 minutes earlier, I assumed the head suddenly reached end-of-life.
So I replaced the head with a new one.
But even after replacing with a new printhead, the issue remained—Light Magenta was still thin in the nozzle pattern.
II. Cause & Fix — When Printhead DATA Cable Is Connected Incorrectly
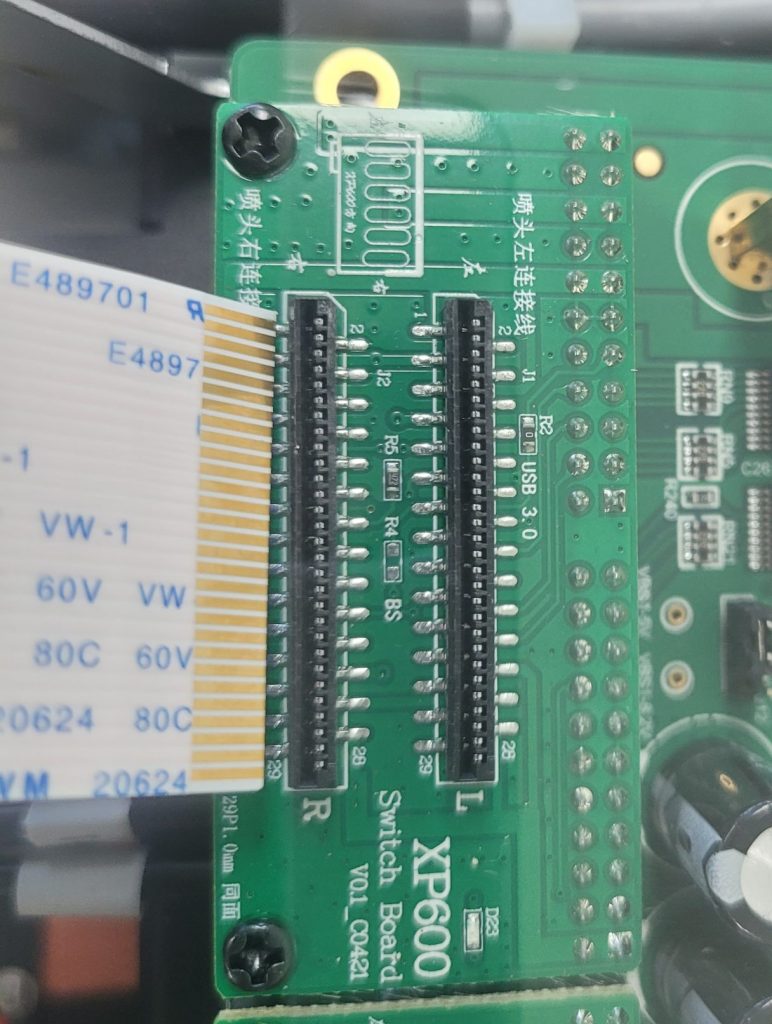
1) DATA cable connection at the electronics board side
However, I had not re-checked the board-side connection before, so I inspected it again.After removing the DATA cable, I found the gold end was slightly outside the board connector area.I don’t have a photo of the exact case, but please refer to your connector area (board + DATA cable alignment) as shown in your reference photo.
2) Solved after replacing the DATA cable
I had not touched the DATA cable connector area for about one year.
Because it had been stable for a long time—and because the “typical incorrect-connection symptoms” did not appear (no LED blinking, no complete ink firing failure)—I initially suspected the printhead itself.
My best estimate of the cause is:
• Over time, the cable gradually shifted outward
• Eventually, only the end part made partial contact
• This “half-connected” state caused an unstable and confusing issue
If a specific color stops printing during a job:
• If a thin bar appears for a specific color, check DATA cable alignment/connection first
During printhead replacement, the DATA cable must be centered precisely on both sides:
• Board side connector: centered
DATA cable work must be done with all power OFF.
Otherwise, the head board, printhead, or DATA cable can be damaged.
To reduce future errors, use a DATA cable with gold-coated contacts whenever possible.
refer to:
Printhead Replacement Method & Precautions (Link)
III. ARTJET UV Printer
Based on over five years of sales and maintenance experience with ARTJET UV printers, one key lesson stands out:
After product stability, the next most critical factor is troubleshooting data.
Every product can encounter issues — whether caused by equipment conditions or user operation.
In real production environments, product reliability depends on how quickly and efficiently those issues can be identified and resolved.
ARTJET continuously collects and organizes real field troubleshooting data to support faster and more accurate problem resolution.
You can view print quality samples here:
[Print quality sample by video]
You can view ARTJET pricing and sales conditions here:
(Note: Exterior design has been updated)
You can also review a complete list of products that can be produced using UV printers here:
[UV Printable Product Guide]

핑백: 12 Problems Related to print head, Organized by Symptom