- The printer software freezes during the initializing sequence
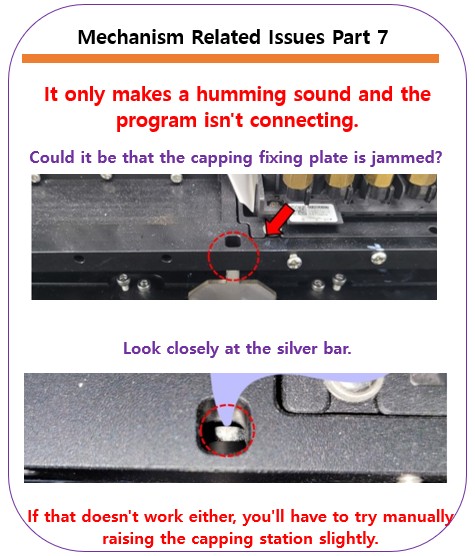
- You hear a humming sound, but no further movement occurs
- The capping station fails to rise to its home position
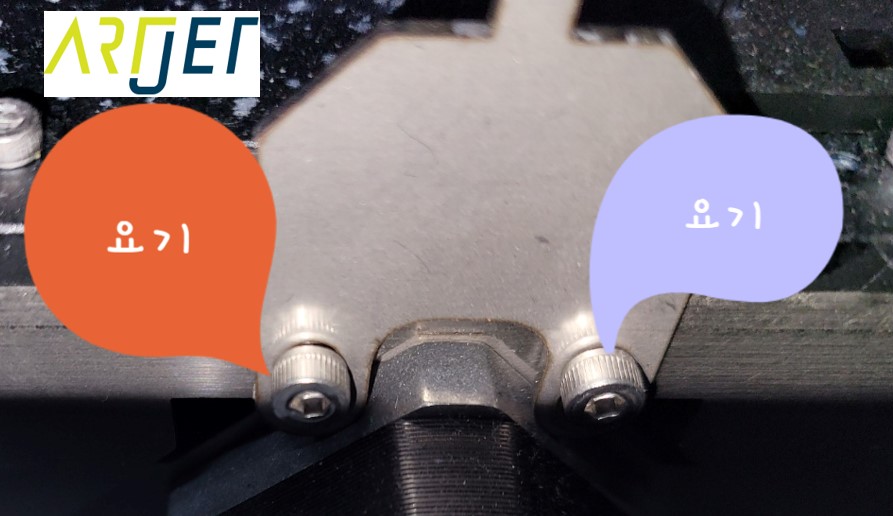
- Releasing the capping station fixing plate screw is straightforward. If it is still locked, you can loosen it yourself.
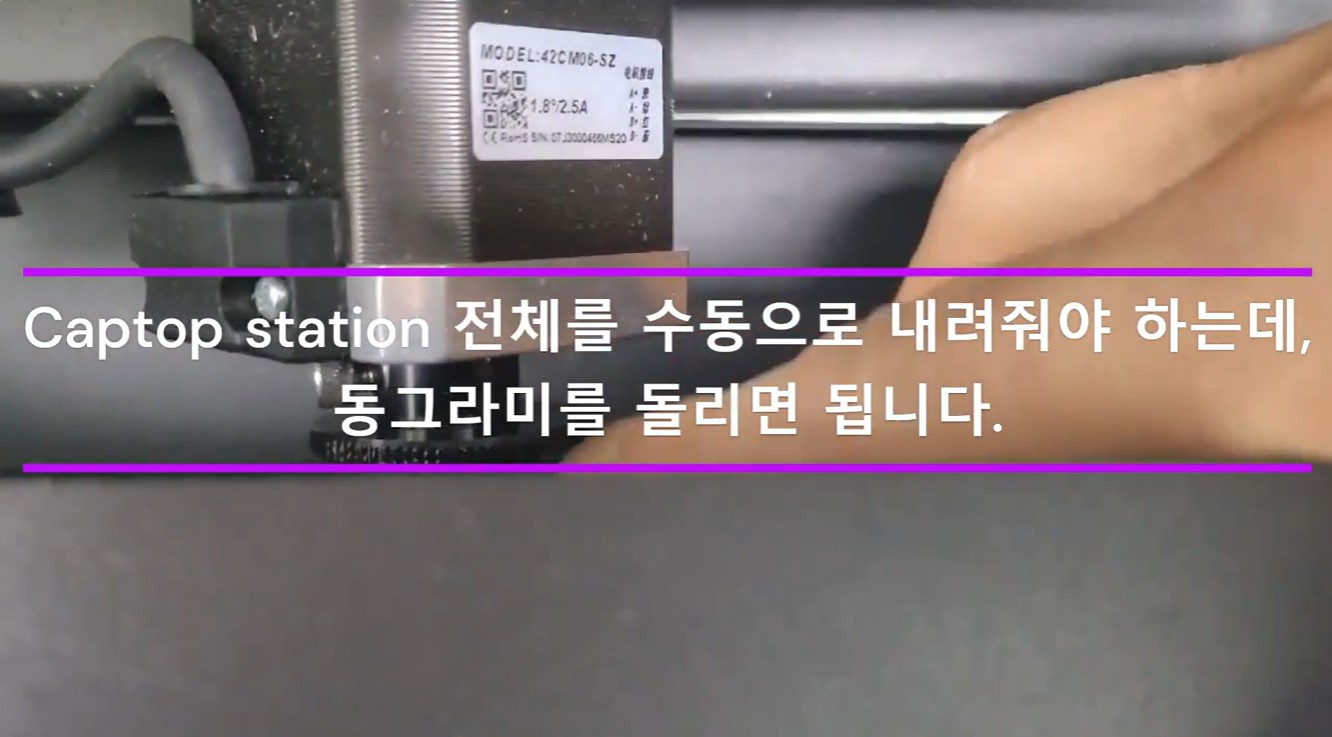
- When manually operating the capping station motor, always turn off the Main switch first.
- Applying excessive force to the motor can damage the motor or gear components.
- Freeze during initializing → Check capping station fixing plate position
- Fixing plate is out of position → Loosen the plate screw and reconnect software
- Motor has reached its lower limit → Turn off Main switch → Manually rotate motor to midpoint → Restart software
I. Symptom — Software Won’t Connect
During printer setup, there are cases where the fixing plate fails to reach its correct position, causing the initializing sequence to stall and preventing subsequent operations.
You may hear a humming sound, but the machine stops there and the software remains frozen.
When the printer software launches, it runs a self-check to verify communication and confirm that all axes are operating correctly.
- It checks communication status, then verifies the home positions of the X, Y, and Z axes, as well as the wiper and capping station.
- In some cases, the sequence stalls at a specific step and does not proceed.
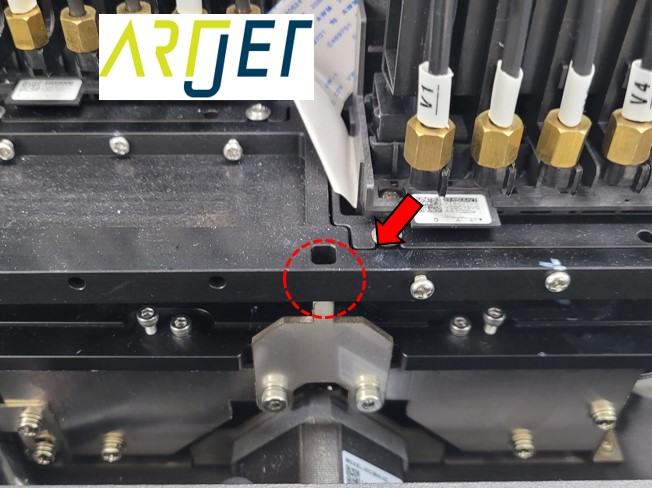
- One such case is when the capping station fixing plate (the silver rod) is in the wrong position, preventing the capping station from rising.

II. Solution — Software Won’t Connect
1. Quick Fix
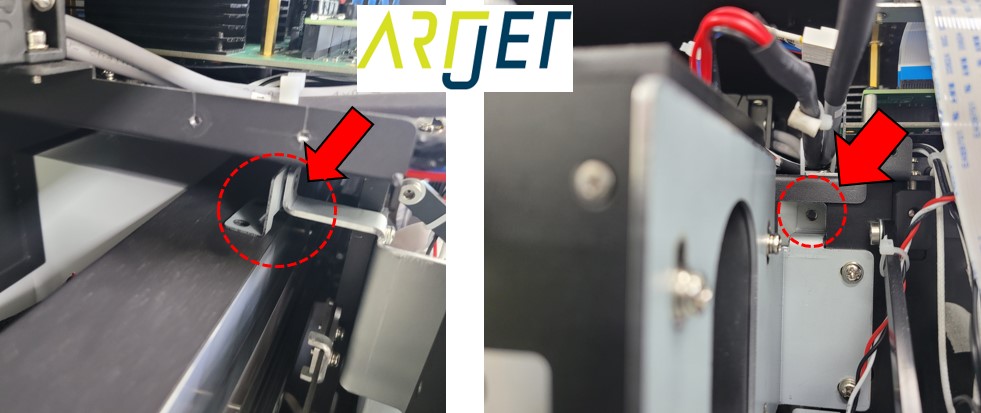
Loosen the capping station fixing plate screw shown in the photo below, then reconnect the software. The issue will be resolved.
There is also a case where the capping station motor has reached its lower limit and cannot operate.
- In this case, turn off all switches including the Main switch,
- then manually rotate the capping station motor back to its midpoint, and restart the software. This resolves the issue.
2. Is It Safe to Loosen the Capping Station Fixing Screw?
The following is not something end users are expected to do themselves.
This explanation is provided to help you understand the role of the capping station fixing plate.
- When unpacking a new machine, there are two things that must be done first.
- The first is to remove the head carriage fixing plate, as shown in the photo below.
- This plate prevents the head carriage from moving during transport, which could otherwise cause damage.
- The second step is to loosen the capping station fixing plate screw described above.
- Leaving the capping station fixing plate in place does not usually cause major problems, but it may cause the software initializing sequence to jam and prevent the next operation from proceeding.
- This screw is re-tightened before the machine is transported to the customer site, and loosened again after delivery.
What the Capping Station Fixing Plate Does
- Once installation is complete, the capping station fixing plate is removed. End users do not need to handle it after that.
- However, from a service and logistics perspective, if the capping station shifts during transport, the cleaning and pumping positions must be recalibrated — making this plate an important component for transport integrity.
