
Print Head End-of-Life Symptoms & Head Swap (Head Issue #6) | ARTJET 2026
• When only one channel (Lc, Lm, etc.) shows noticeable quality loss
• When you need to separate a true head end-of-life issue from a DATA-related issue before replacing the head
• Field users who want to reduce head replacement cost by operating with head swapping (swap strategy)
• Before swapping heads, take photos of the damper connections (to avoid channel order mistakes)
• After swapping, 반드시 remove old ink by pumping and run cleaning (required)
• Check Align and Offset before production use
• If the damper/channel order is wrong, the entire color output can shift incorrectly
This case describes a print head end-of-life issue where the nozzle test appears normal, but real print quality degrades.
The nozzle test did not look clogged, but the actual image print showed reduced expression/definition in a specific color channel (Lc).
A comparative channel test confirmed internal head wear / end-of-life as the root cause.
After checking the DATA cable, board, and ink contamination, no issues were found.
The final conclusion was a print head that had been used for over one year had reached end-of-life.
So far, we have organized UV printer troubleshooting topics below. Click each item to open the detailed post.
- Print Head Basics (9 posts)
- Real Head Issues & Fixes (12 posts)
- Mechanical Issues & Fixes (10 posts)
- Electronic Boards and Software Issues(12 posts)
- SAi RIP Installation / Basic Settings / Spot Color & Fixes (11 posts)
- Complete List of Products You Can Make with a UV Printer
If cleaning/pumping does not work properly, or printing quality suddenly drops during production, there are two main directions to check.
1. Ink Supply
- Printing errors caused by ink supply issues (including cleaning and pumping problems) have been updated recently.
- If your printer uses dampers, the posts below can help you solve most ink-supply related issues.
- This is a 23-post table of contents with photos. Click the TOC items inside to open each post.
- Printer Cleaning Problems Part 23 Table of Contents ARTJET 2026
2. DATA-Related Issues (electronic boards, print heads, DATA cables, etc.) — currently being updated
- Part 1: Symptoms & Fix When a DATA Cable Is Contaminated by Ink
- Part 2: 17 Stored Used Heads: How Many Worked After Alcohol Cleaning & What Errors Appeared
- Part 3: A Specific Color Prints Abnormally During Printing
- Part 4: How to Print on Reflective Materials + More Dangerous Causes That Can Clog Nozzles
- Part 5: Real Case: Reviving a White Head Not Used for One Month
[Click here for the “clogged white head” recovery method]
In this post, I will explain the symptoms you see when a print head reaches end-of-life, and how we solved it by swapping heads.
I. Symptoms _ Print Head End-of-Life Symptoms
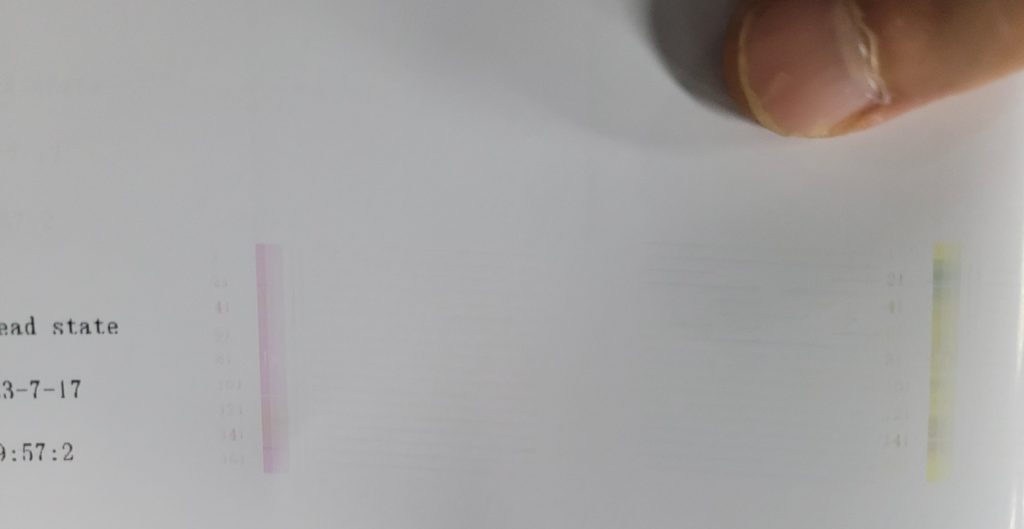
1. Nozzle Test
During printing, the colors were not represented correctly.
- In the nozzle pattern, CMYK + Lc + Lm appeared to be printed, and it seemed like no nozzles were missing.
- However, when printing the actual image file, the colors looked abnormal.
- When we inspected the nozzle pattern closely, the small Lc nozzles were visible,
- but unlike the adjacent Lm and Yellow patterns, the thick bar lines did not appear.
Note: Yellow looked slightly mixed with black. During printing, residual black ink under the head naturally clears out, and Yellow returns to a pure Yellow tone.
2. Lc vs Lm Comparison Test
To diagnose the issue accurately,
- we printed only the Lc channel (where the thick lines were missing).
- In the software, we turned OFF CMYK and Lm, and turned ON only the Lc channel.
- With this setting, only Lc prints during the job.
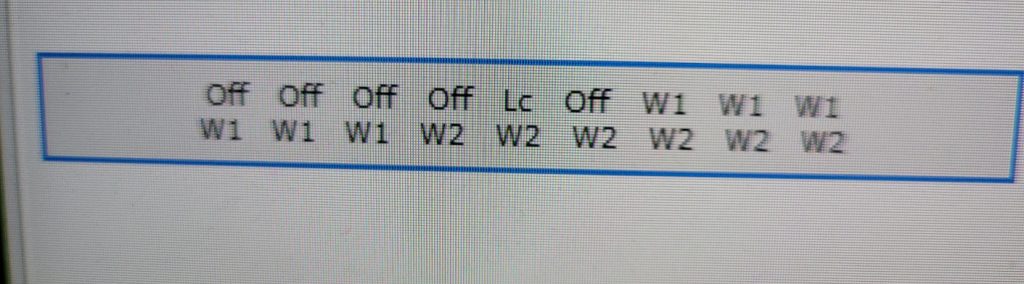
- Then, for comparison, we turned Lc OFF and turned only Lm ON, and printed again.
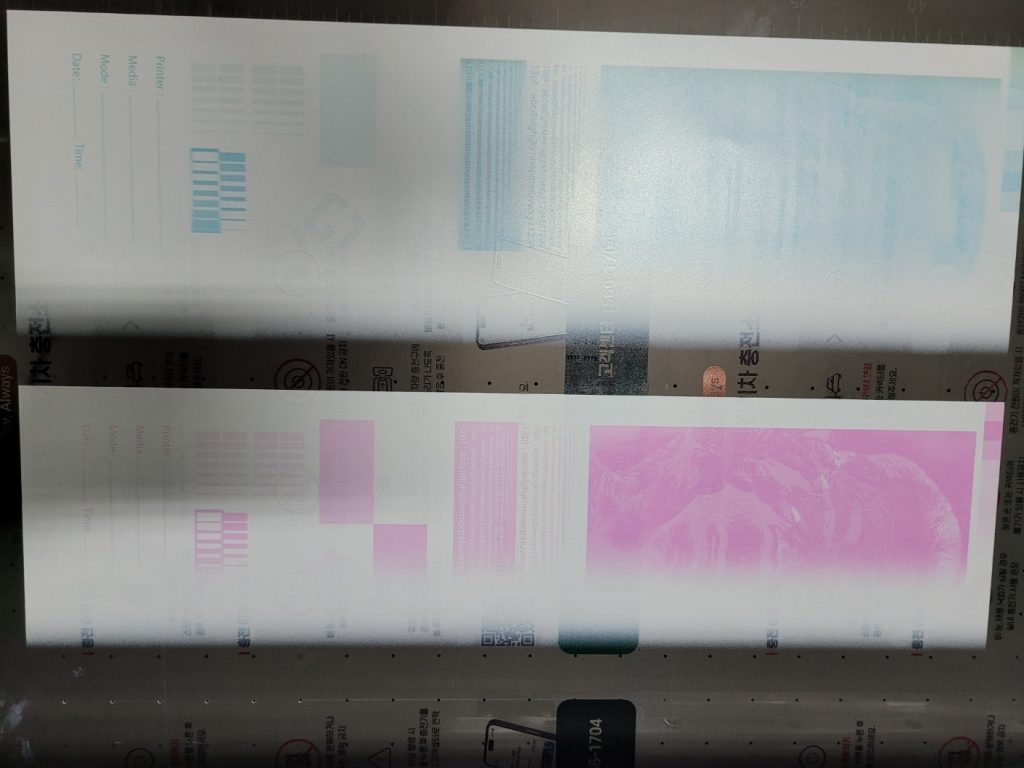
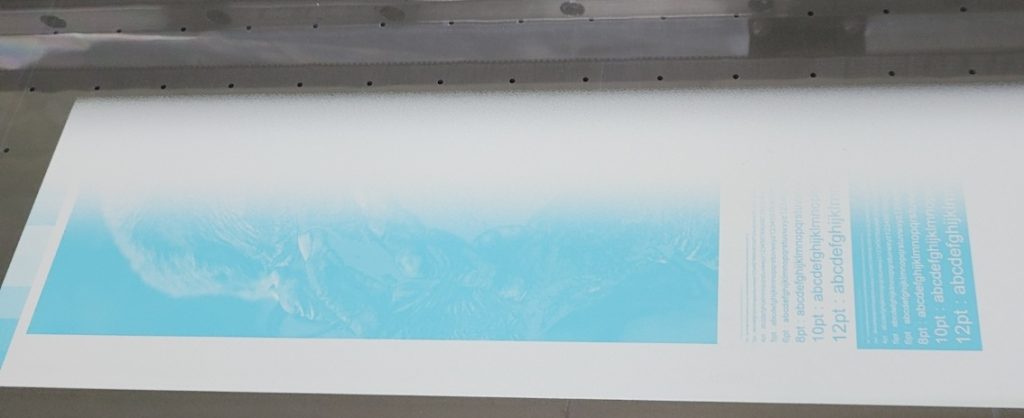
The photo below shows the result.
- With Lc, the engraved (negative) letters were not expressed correctly.
- The negative text area should be empty (like the Lm print), but it was not.
- You can clearly see the surface difference between Lc and Lm prints.
II. Cause & Action _Print Head End-of-Life Symptoms
1. DATA Cable or Print Head?
First, we unplugged and reconnected the print head DATA cable on the top of the board. The issue remained.
We also visually checked the DATA cable connection area under the print head. It was clean and showed no ink contamination.
In the end, the root cause was the print head itself — it had been used for over one year and reached end-of-life.
2. Swapping the Color Head with the Varnish Head
Only one channel out of the six (Lm) had degraded, so replacing the entire head with a new one felt too expensive.
We solved the issue by swapping the rarely used varnish head with the color head.
3. Required Steps After Swapping Heads
Remove the old ink inside the head
- Even after swapping, the previous ink remains inside both the color head and varnish head.
- After connecting the dampers, you must pump to remove the remaining ink inside the head.
- Once ink flows into the waste ink tank, wait about 10–15 seconds — then the ink inside the head is effectively replaced.
- Then run cleaning.
Check Color / Varnish head alignment & offset
- The head mounting area is block-based, so alignment is usually close.
- Still, click the [Align] button to confirm the head is vertical.
- Then adjust offset using the section below.
- Offset Fine Tuning
Set the correct channel order
- After a head swap, some users confuse the damper positions.
- Always take a photo of the damper order before replacement.
- If the damper order is wrong, the entire color output shifts.
- For example, if Yellow data is sent to channel 4 but the Light Cyan damper is connected to channel 4, Yellow data will print as Light Cyan.
- Also, for the color head moved to the varnish position, lock (turn OFF) only the problem channel (Lc) in the software and continue operating.
- Refer to the image below for channel switching and locking functions.

III. Why We Swapped Heads (Cost-Saving Strategy)
Our printer uses three XP600 (FA1080-a1) heads.
Each head has 6 channels, and each channel can be connected to different ink colors.
- Head #1 (Color): C, M, Y, K, Lc, Lm
- Head #2 (White): W W W W W W (all channels are White)
- Head #3 (Varnish): V V V V V V (all channels are Varnish)
We swapped the color head to the varnish position and moved the varnish head to the color position because:
- Even one bad channel on the color head affects color reproduction and print quality.
- White and varnish typically use all 6 channels and have enough density, so you can lock one channel and run with the remaining 5 channels without major issues.
- If the color head develops a problem, swapping with white or varnish can extend usage time and reduce head replacement cost.
When touching the head, head cables, or electronic boards, always work with the main power fully OFF.
Reference videos for head replacement:
- DATA cable connection: XP600 print head data cable connection
- Head installation: XP600 (FA1080-a1) print head installation
- Board replacement: (power-off procedure is critical) ARTJET electron board replace.
How to replace the head-side cable without removing board cables:
IV. ARTJET UV Printer
Based on over five years of sales and maintenance experience with ARTJET UV printers, one key lesson stands out:
After product stability, the next most critical factor is troubleshooting data.
Every product can encounter issues — whether caused by equipment conditions or user operation.
In real production environments, product reliability depends on how quickly and efficiently those issues can be identified and resolved.
ARTJET continuously collects and organizes real field troubleshooting data to support faster and more accurate problem resolution.
You can view print quality samples here:
[Print quality sample by video]
You can view ARTJET pricing and sales conditions here:
(Note: Exterior design has been updated)
You can also review a complete list of products that can be produced using UV printers here:
[UV Printable Product Guide]

핑백: Solid Color Banding Fix Tips _ Printhead Issue #7 _ ARTJET 2026
핑백: Printhead Replacement Video and Precautions _ Head related issues 11 _ ARTJET 2026