- Anyone learning for the first time how to create White and Varnish Spot colors in an Ai file
- Your Spot color setup looks correct, but only the Spot color appears in the RIP — the original color is gone
- White spot prints correctly, but Varnish spot does not print at all
- You named the Spot layers exactly as shown in the video, but the RIP still does not recognize them as White or Varnish
- Spot color is not being picked up correctly due to a Clipping Mask or Compound Path in the Ai file
- White spot disappears on thin lines or small text
- Both the White layer and Varnish layer must be copied from the original color image layer. If Varnish is copied from the White spot layer, Varnish will not print.
- White and Varnish layers must be placed above the color layer. If placed below, the Spot settings will not be applied.
- Spot color is not picked up correctly on images with a Clipping Mask applied. Check each channel in the RIP and release the Clipping Mask if needed.
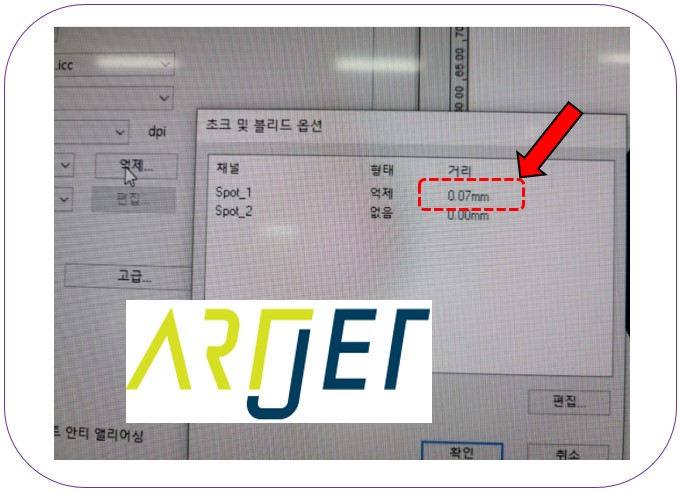
- If White spot disappears on thin lines or small text, reduce the White suppression area in the RIP options.
- Color not showing in RIP → [Overprint Fill] checkbox missing in the Ai file
- Varnish not printing → Check layer order, or Varnish was copied from White spot instead of the original color layer
- Spot channel not recognized → Release Clipping Mask or Compound Path in the Ai file
- Small text White disappears → Reduce White suppression area in RIP options
I. Creating Spot Color Ai Files — How to Create Spot Colors in Flexi RIP and Fix Common Problems
Whether you’re an experienced designer or, like me, someone completely new to Ai files — I’ve put together a video showing exactly how to create Spot colors in an Ai file and print them using Sai Flexi RIP.
- As shown in the image below, you can use Spot colors to define the White area and Varnish area directly in your Ai file.
-

How to Create Spot Colors in Flexi RIP and Fix Common Problems - The text “Printing & Coating Process Technology” has a White spot assigned, so White is printed underneath the text.
- The orange rectangle has a Varnish spot assigned, so Varnish is printed only over that orange area.
- Watch the video below for a full step-by-step walkthrough.
- I recommend watching from start to finish without skipping.
- How to create White and Varnish Spot colors in an Ai file and print them using Sai Flexi RIP
How to verify Spot color settings inside the Ai file (watch the video above before reading this section)
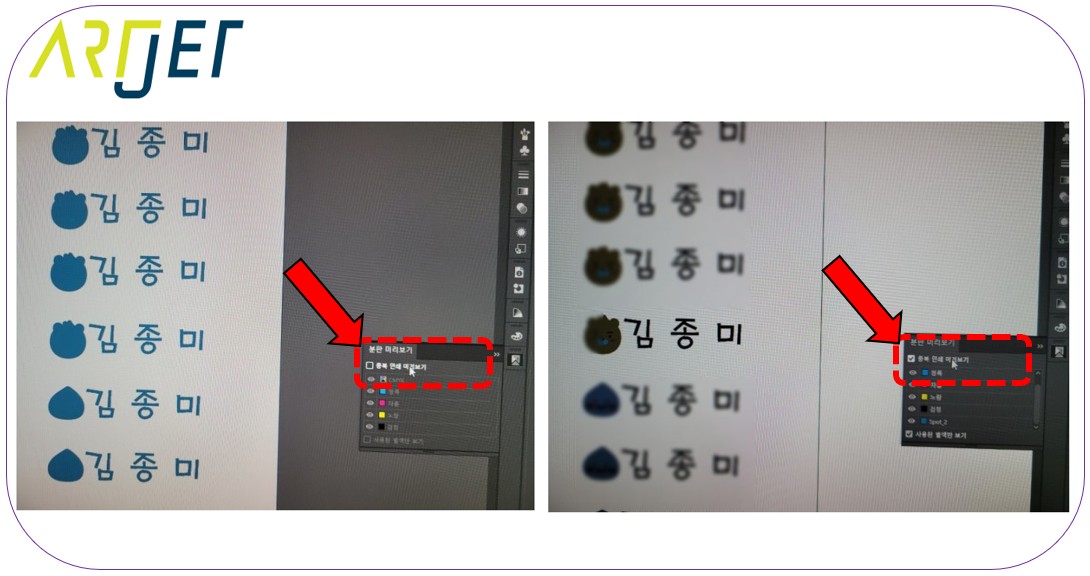
- Once you’ve finished setting up your White and Varnish Spot color layers in the Ai file, there’s a way to confirm everything was applied correctly.
- Go to [Separations Preview] and select [Overprint Preview]. This lets you see the original colors hidden beneath the Spot color fill.
- If those original colors show through correctly, your Spot color setup is working as intended.
- Whether or not this option is checked does not affect the actual print output.
-
How to Create Spot Colors in Flexi RIP and Fix Common Problems
Important update for video viewers
- The video was recorded before a Sai Flexi RIP upgrade. Please note the following corrections.
- Spot_2 / White has been renamed. The White spot layer must now be named Spot_1.
- Spot_4 / Varnish has been renamed. The Varnish spot layer must now be named Spot_2.
- With the correct layer names, the RIP will automatically assign Spot_1 as White and Spot_2 as Varnish — no manual configuration needed.
II. When Spot Colors Don’t Print Correctly — Causes and Fixes
The following section only makes sense after watching the video above.
If you followed the video exactly but Spot colors still aren’t printing correctly, check the issues below.
Issue 1. You imported the Ai file into Sai Flexi RIP, but only the Spot 1 color appears — the original color is missing.
- You’ve set up Spot 1 and Spot 2 layers correctly, but when you load the image into the RIP, only the Spot 1 color shows.
- You print anyway thinking it’ll be fine — but the output shows the Spot 1 color instead of the original image colors.
- The layers themselves are correct. The missing step is the [Overprint Fill] checkbox on those layers.
- Once you check [Overprint Fill] on the Spot layers in Illustrator and reload the file, the RIP will display the correct colors and the print will come out properly.
Issue 2-1. White spot prints correctly, but Varnish spot doesn’t print at all.
- This is the most common mistake made by people who watched the video too quickly.
- It happens when the White layer is placed above the color layer, but the Varnish layer is placed below it.
- Both the Varnish spot layer and the White spot layer must be placed above the color layer before saving the Ai file. Only then will both White and Varnish spots be applied correctly.
Issue 2-2. The Varnish layer is above the color layer and saved correctly — but Varnish still doesn’t print.
- A customer called in with this exact problem.
- “I finally figured it out. I copied the White spot from the original color layer, but I copied the Varnish spot from the White spot layer — that was the problem. Once I copied both from the original color layer, it worked fine.”
- Both the White layer and Varnish layer must be copied from the original color image layer.
Issue 3. You’ve done everything correctly, but the original color still doesn’t appear — only the White Spot color prints.
- The original color layer should be printing, but instead, only the color assigned to the Spot is coming out — like this.
-
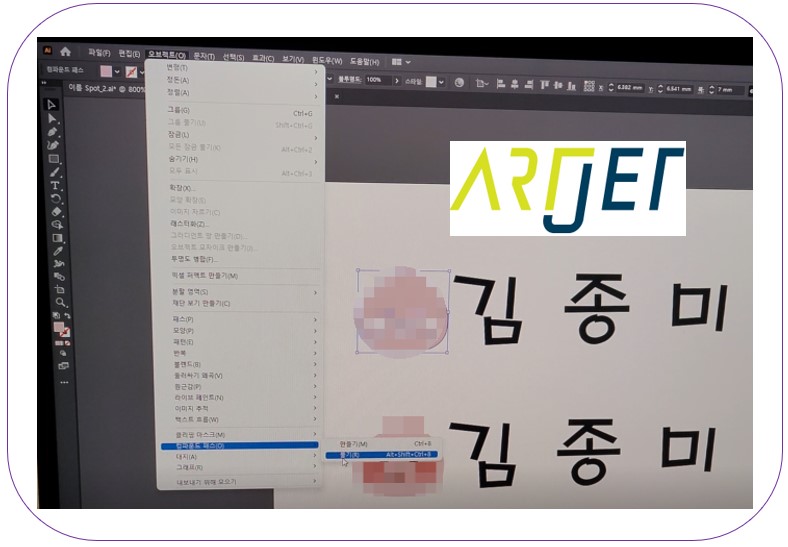
How to Create Spot Colors in Flexi RIP and Fix Common Problems - This was resolved by releasing the Compound Path inside the Ai file.
- See the image below for how to release a Compound Path.
-
How to Create Spot Colors in Flexi RIP and Fix Common Problems
Issue 4. Releasing a Clipping Mask
- A Clipping Mask is a feature that shows only the portion of an image inside a defined shape — everything outside is hidden.
- When a Clipping Mask is applied, the image appears as one object in the Ai file, but it’s actually two. This prevents the Spot color from being picked up correctly.
- The file may look fine inside Illustrator, but once loaded into Sai Flexi RIP and the channels are checked, the Spot color won’t register properly.
- If the Spot channel is not recognized in the RIP, release the Clipping Mask in the Ai file.
Issue 5. White spot layer disappears on thin lines or small text
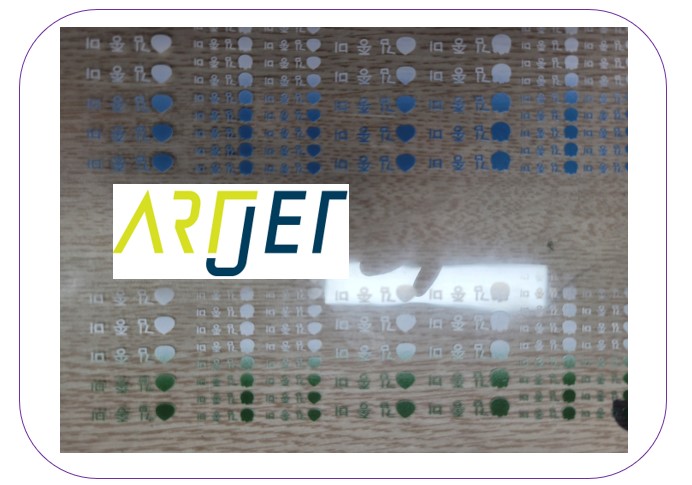
- You can verify Spot color channels using [Channel Preview] in Sai Flexi RIP.
- The color channel looks correct, but when you check the White Spot channel, the text disappears — as shown below.
-

How to Create Spot Colors in Flexi RIP and Fix Common Problems - Sai Flexi RIP includes a White suppression feature that shrinks the White area inward relative to the color.
- This feature reduces the White footprint beneath the color layer.
- Without suppression, White can bleed past the edge of the color — causing print defects. That’s why all RIP software includes this feature.
- The suppression amount can be adjusted in the RIP options. In this case, the suppression area was larger than the text itself, so the text was eliminated entirely.
-
How to Create Spot Colors in Flexi RIP and Fix Common Problems
III. ARTJET UV Printer
