- Anyone whose bidirectional prints look noticeably rougher than usual
- Anyone seeing double images or text when viewed under a 10x magnifier
- Anyone whose bidirectional print quality varies inconsistently when switching substrates
- Anyone whose prints come out fine on pet film but rough on acrylic or other substrates
- Anyone unsure of when and under what conditions the bidirectional Offset needs to be recalibrated
- The bidirectional Offset value is only valid for the Standoff (head-to-substrate gap) at the time of calibration. If the substrate thickness changes, recalibration is required.
- The bidirectional Offset must be calibrated separately for each X-axis carriage speed (Slow / Normal / Fast). Changing speed changes the ink landing point.
- In areas where the flatbed flatness error exceeds 0.1mm, bidirectional print quality may deteriorate.
- Always operate with the understanding that bidirectional printing has inherent quality limitations compared to unidirectional. Choose based on your job requirements.
- Rough bidirectional output → First check whether the Standoff matches the height used during the original Offset calibration.
- Rather than spending time diagnosing, recalibrating the bidirectional Offset directly on the actual substrate is the fastest fix.
- Recalibration is needed when: substrate thickness changes / X-axis carriage speed changes / machine restarted after extended downtime.
- Bidirectional printing is 70–80% faster than unidirectional, but more sensitive to Standoff variation. For high-quality jobs, use unidirectional mode.
What you must know about bidirectional printing — Standoff and Offset
I. The Image Looks Too Rough — What You Must Know About Bidirectional Printing
The quality difference between bidirectional and unidirectional printing will be explained at the end of this article.
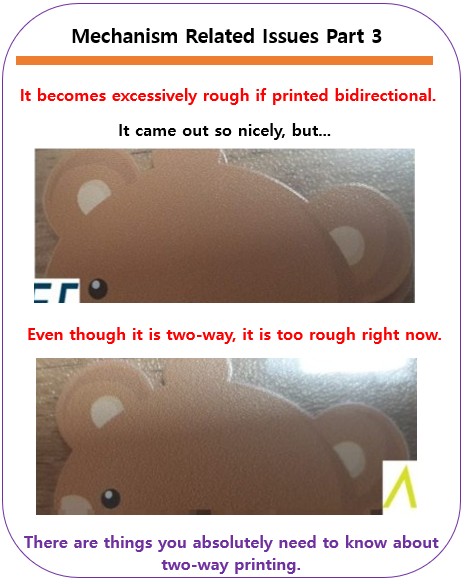
First, let’s describe the symptom.
- Even accounting for the fact that bidirectional printing produces lower quality than unidirectional,
- the print quality shown in the photo below looked noticeably rougher than usual.
- It’s not immediately obvious from a distance,
- but anyone experienced in print production would take one look and think: “That looks rough.”
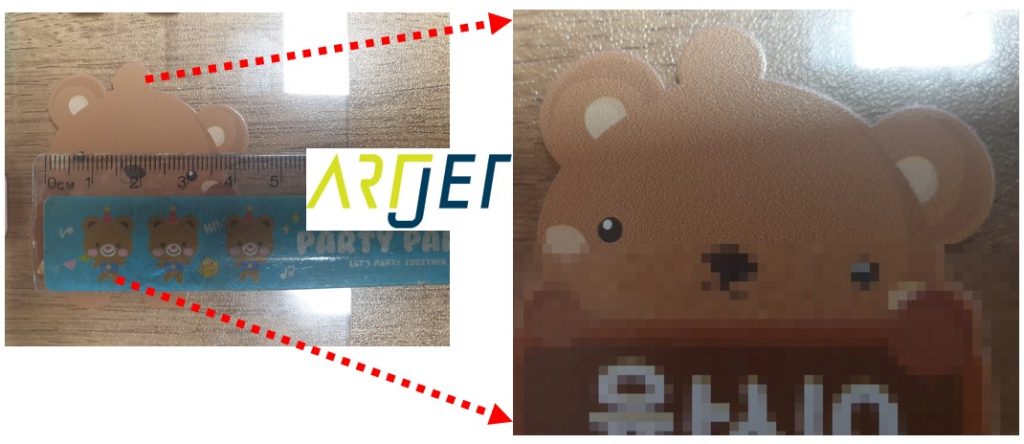
- It’s difficult to show in a photo, so we’ve zoomed in on the right side. The background behind the bear character has a slightly rough texture.
A brief note on where bidirectional Offset values are configured by carriage speed in the printer software.
- Head carriage speed and flatbed feed speed each have three settings: Slow, Normal, and Fast.
- Our printer uses Normal as the default.
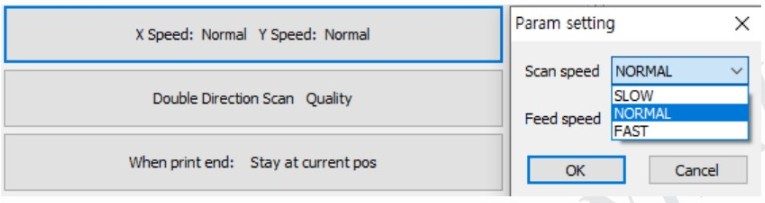
The print conditions for the image above were as follows.
- Head carriage X-axis speed: Normal
- Flatbed Y-axis feed speed: Normal
- Print direction: Bidirectional (Double direction scan)
- G-mask mode: Quality mode — 3rd level G-mask used as default (out of 4 levels) to reduce banding
- Front-side printing: White printed first, then Color printed on top
II. Cause and Resolution — What You Must Know About Bidirectional Printing
1. Various Theories and Tests
Theory 1. Different conditions between front-side and back-side printing?
- Could the difference in Mask logic (the pattern in which dots are laid down) between front-side and back-side printing cause the rough output?
- We prepared a front-side sample (White first, then Color on top) and a back-side sample (Color first, then White on top) using the same image.
- Both samples printed rough — no significant quality difference between them.
- Front-side vs. back-side Mask was not the cause.
Theory 2. White ink density causing the quality issue?
- Our printer can print White at up to 600% density relative to Color.
- Up to 300%, the White layer forms evenly. At 600%, too much ink is applied and the White surface becomes uneven and rough.
- We reduced White density to 200% — the result was the same.
- White ink density was not the cause.
Theory 3. Acrylic thickness variation causing the issue?
- We measured the thickness at all four corners of the acrylic: 1.51mm, 1.55mm, and 1.58mm — some variation existed.
- Bidirectional print roughness typically occurs when the standoff differs by 1–2mm from the calibration height, so this variation was within acceptable range.
- Acrylic thickness variation was not the cause.
Theory 4. Would lowering the head height help?
- With acrylic thickness at 1.5mm, the Z-axis head height was set to 1.5mm for printing.
- We tried 1.4mm (0.1mm lower) — the problem remained.
- We tried 1.6mm (0.1mm higher) — still no improvement.
- Fine-tuning the head height was not the cause either.
2. Root Cause
A puzzling observation
- “It prints fine on pet film… so why does the image come out rough on acrylic?”
- Printing on pet film resolved the roughness issue immediately.
- We started thinking about what was different between printing on acrylic vs. pet film.
- Going back to basics, we examined the acrylic prints under a 10x magnifier — and found that at all three Z-axis heights (1.4mm, 1.5mm, 1.6mm), the text appeared doubled, to varying degrees.
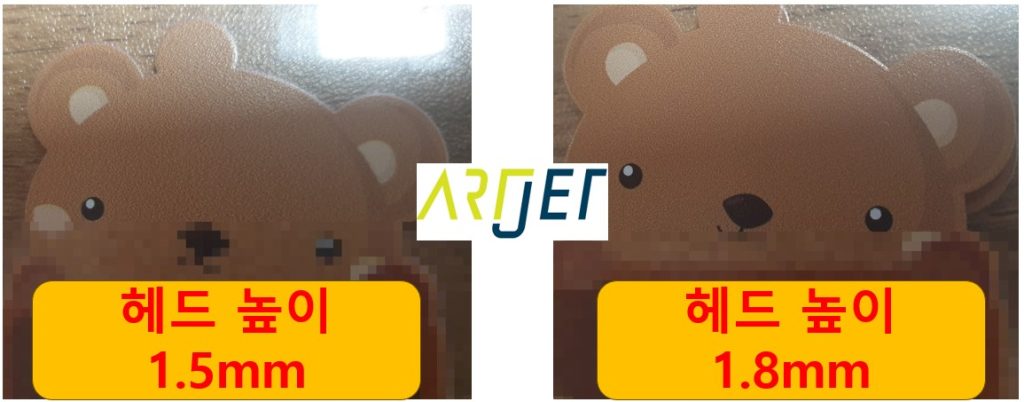
- Normally, a smaller head-to-substrate gap produces better bidirectional quality — but in this case, 1.6mm actually looked cleaner than 1.4mm.
- On a hunch, we tried 1.7mm — it looked even cleaner. At 1.8mm, print quality improved as shown in the photo below.
- Important: the improvement was not because the head height was raised. The real cause is explained below.
How bidirectional Offset calibration works
- The bidirectional Offset value must be recalibrated whenever either of two variables changes.
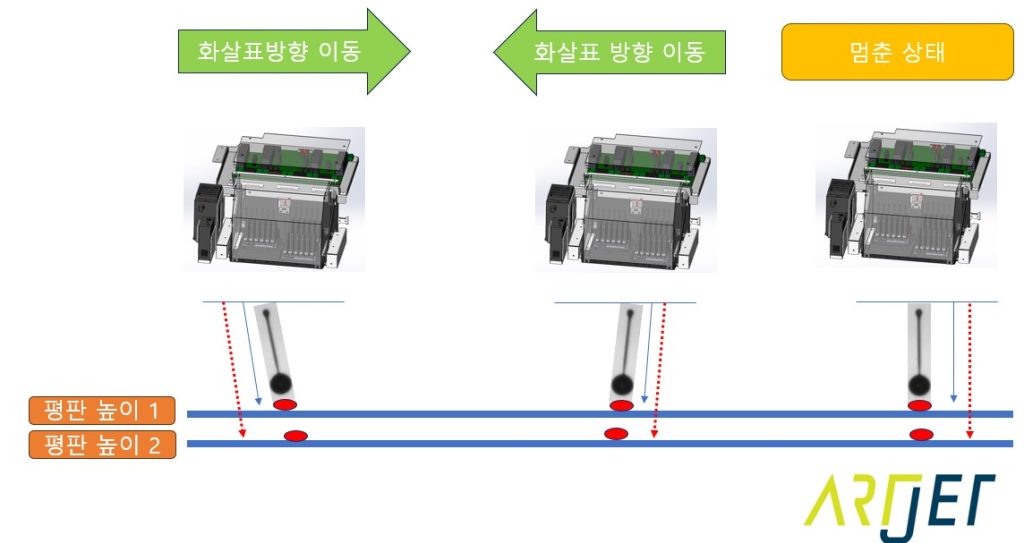
- The first is X-axis carriage speed. An Offset calibrated at Normal speed cannot be applied at Fast speed — because the ink landing point shifts with speed.
- The second is Standoff (the gap between the substrate and the head). As shown in the diagram below, the ink landing point differs between head height 1 and head height 2.
- For example: if the bidirectional Offset was calibrated at a Standoff of 1.2mm, but the actual print is done at 1.5mm, the landing points won’t align — resulting in doubled text or rough output.
Confirming whether the Standoff matches the calibration height
- Bidirectional Offset is typically calibrated at a Standoff of 1.2mm.
- If the actual print Standoff is 1.2mm, the image renders cleanly.
- If the Standoff differs from 1.2mm, the ink landing point shifts — causing rough output.
Why the 1.5mm acrylic produced rough output:
- The original bidirectional Offset was calibrated at a Standoff of 1.5mm — not the standard 1.2mm.
- When printing on the acrylic, the head was set 1.2mm above the substrate surface — which did not match the calibration Standoff, causing the Offset to be applied incorrectly.
- The reason quality improved at 1.8mm was that it brought the total Standoff close to 1.5mm (1.5mm substrate + ~0.3mm gap) — matching the original calibration condition.
Field Tip
- Diagnosing the issue by adjusting head height in small increments takes a lot of time.
- A much faster solution: recalibrate the bidirectional Offset directly on the actual substrate you intend to print on.
- If text appears doubled under a 10x magnifier or the image looks rough during bidirectional printing, recalibrate the bidirectional Offset on that substrate before starting the actual job.
Quality limitations of bidirectional printing
- Bidirectional printing is 70–80% faster than unidirectional, but always operate with the understanding that it has inherent quality limitations.
- Flatbed flatness variation can cause print quality to differ from zone to zone.
- A Standoff variation of up to 0.1mm makes little difference — but beyond 0.1mm, the Offset value becomes misaligned, causing rough output or doubled text under magnification.
III. ARTJET UV Printer
