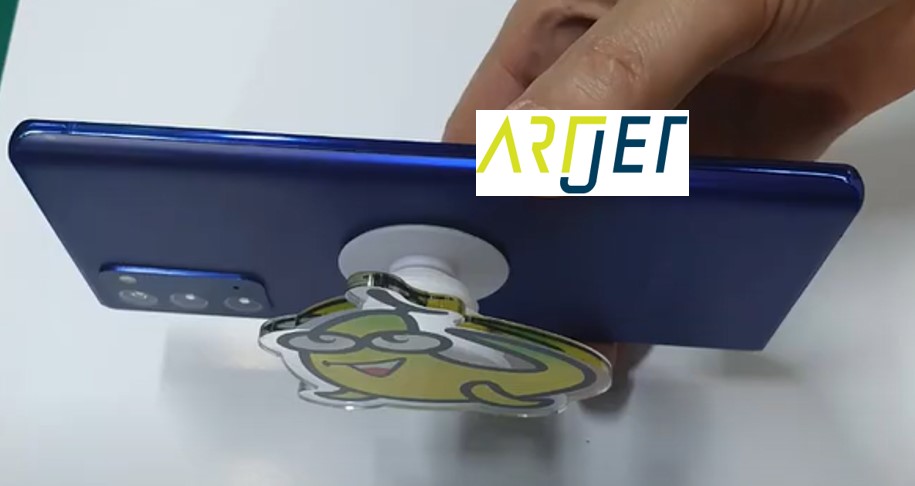
ARTJET UV Printer Application 21 _ UV Printer+Laser Cutting Making a Cell Phone Grip Tok
ARTJET UV Printer has been sold in Korea for 4 years, and we are organizing the printer problems we have encountered so far, their causes, and their solutions.
We have compiled 10 different print head problems and 17 ink supply problems, and you can find detailed information at the site below.
ARTJET UV Printer troubleshooting sum up
From last time, we are explaining not only UV printer problems and solutions, but also what products are produced with UV printers.
In the first session, ARTJET UV Printer Application 1 braille printing
In the second session, ARTJET UV Printer Application 2 Flip the material and align it
In the third session, ARTJET UV Printer Application 3 2.5D UV print
In the fourth session, Sai rip [Color Adjustment] tab. ARTJET UV Printer Application 4 Sai rip color graph
In the fifth session, ARTJET UV Printer Application 5 Sai rip print size compensation
In the sixth session, we talked about the acrylic bonding equipment that those who have UV printers and laser cutting equipment are looking for.
Hereuner is only Korean since only Korea is hot on this machine. ARTJET UV Printer Application 6 _아크릴 본딩 장비
In the seventh session ARTJET UV Printer Application 7 _ Ink Consumption Calculation
In the Eighth session, ARTJET UV Printer Application 8 _ I phone 14 print limitation
About K print, Korea Signage Label & special printing exhibition, ARTJET UV Printer Market research 1 _ K Print 2024 Korea printing exhibition
In the ninth session, ARTJET UV Printer Application 9 _ Mask printing not recommend
In the tenth session, ARTJET UV Printer Application 10 _ Leather Cigarette Case UV Printing
In the eleventh session, ARTJET UV Printer Application 11 _ Round soccer strategy board UV printing
In the twelve session, ARTJET UV Printer Application 12 _ What is ICC profile & menu board UV Printing
In the thirteen session, ARTJET UV Printer Application 13 _ Primer performance & limitation
In the fourteen session, ARTJET UV Printer Application 14 _ UV Print & Laser crop mark cutting
In the fifteen session, ARTJET UV Printer Application 15 _ Mobil case UV print profit
In the sixteen session, ARTJET UV Printer Application 16 _ Screen vs Digital Comparison and UV Printing on Hand Sanitizer Cases
In the seventeen session, ARTJET UV Printer Application 17 _ bottle print
In the eighteen session, ARTJET UV Printer Application 18 _ Canvas UV Printing
In the nineteen session, ARTJET UV Printer Application 19 _ Applying epoxy effect with varnish
In the twenty session, ARTJET UV Printer Application 20 _ Making a light frame with a printer+laser cutter
In the twenty one session, ARTJET UV Printer Application 21 _ UV Printer+Laser Cutting Equipment Button Name Tag Making
Today I’m going to show you how to make a griptok for your phone using a UV printer and laser cutting machine.
I. Preparation and precautions!!
1. Ai file
Ai file must have a total of 4 layers: Crop mark layer, Cut line layer, Color image layer, and White spot layer.
UV printing uses a total of 3 layers: Crop mark layer, Color image layer, and White spot layer.
Laser cutting uses two layers: Crop mark layer and Cut line layer.
After UV Printer printing, refer to the following for the method of linking Laser crop mark cutting using a camera.
ARTJET UV Printer Application 14 _ UV Print & Laser crop mark cutting
2.UV Printer and Acrylic
To print on transparent acrylic, you don’t need varnish, but you need a UV printer that can print color and white. Acrylic is mostly 3mm thick.
3. UV Ink and Acrylic Adhesion
Since the ink may fall off if the acrylic adhesion is weak by attaching the Acrylic and griptok with double-sided tape,
you should check if the ink adhesion is good on the acrylic you are using.
In the actual manufacturing company,
* Apply manual primer to the acrylic and UV print
* Use hard-coated acrylic to secure UV ink adhesion.
* After printing the inkjet primer on the equipment itself, re-print in color white.
4. Laser cutting
It has crop mark cutting function for better workability.
II. Production process
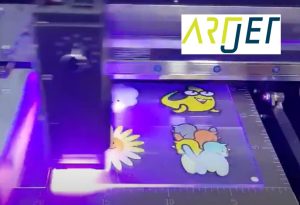
1. UV Printer Print
Save the Crop mark layer, Color Layer, and White layer separately in the Ai file and use them as print files.
Most cell phone grip toks do not proceed with Color White Color 3 layers, but proceed with Color + White, 2 Layer mirror printing.
Since we used hard-coated, or pre-processed acrylic, we printed directly without using a manual primer or inkjet primer.
2. Laser cutting
Only the crop mark layer and cut line layer are saved separately and used.
In the photo below, the crop mark is white so it is not visible, but it is a cutting file that includes the crop mark.
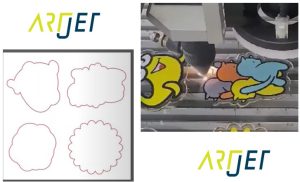
Cutting complete

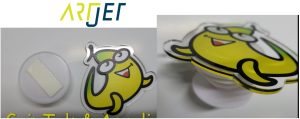
3. GripTok Preparation
GripTok and acrylic are attached using double-sided tape.
4. Attaching a cell phone
Remove the protective film from the GripTok attachment surface and attach it to your phone to complete the installation.

5. Making process video
You can see more detailed manufacturing process by watching the video below.
The printer used is Xaar1201 print head, which is discontinued and no longer available for sale. Please refer to it.
https://www.youtube.com/watch?v=W6wk-LlIYTs&t=56s
That’s it for today.